Table of contents:
Want a transcript of a YouTube video? Whether it’s your own video or someone else’s, getting a full, accurate transcript is easier than you think.
In this guide we’ll show you step by step how to get a YouTube transcript so you can edit, repurpose, or caption it.
How to find a transcript on YouTube
Most YouTube videos include an auto-generated transcript, but need to know where to look to find it. Here’s how to find it:
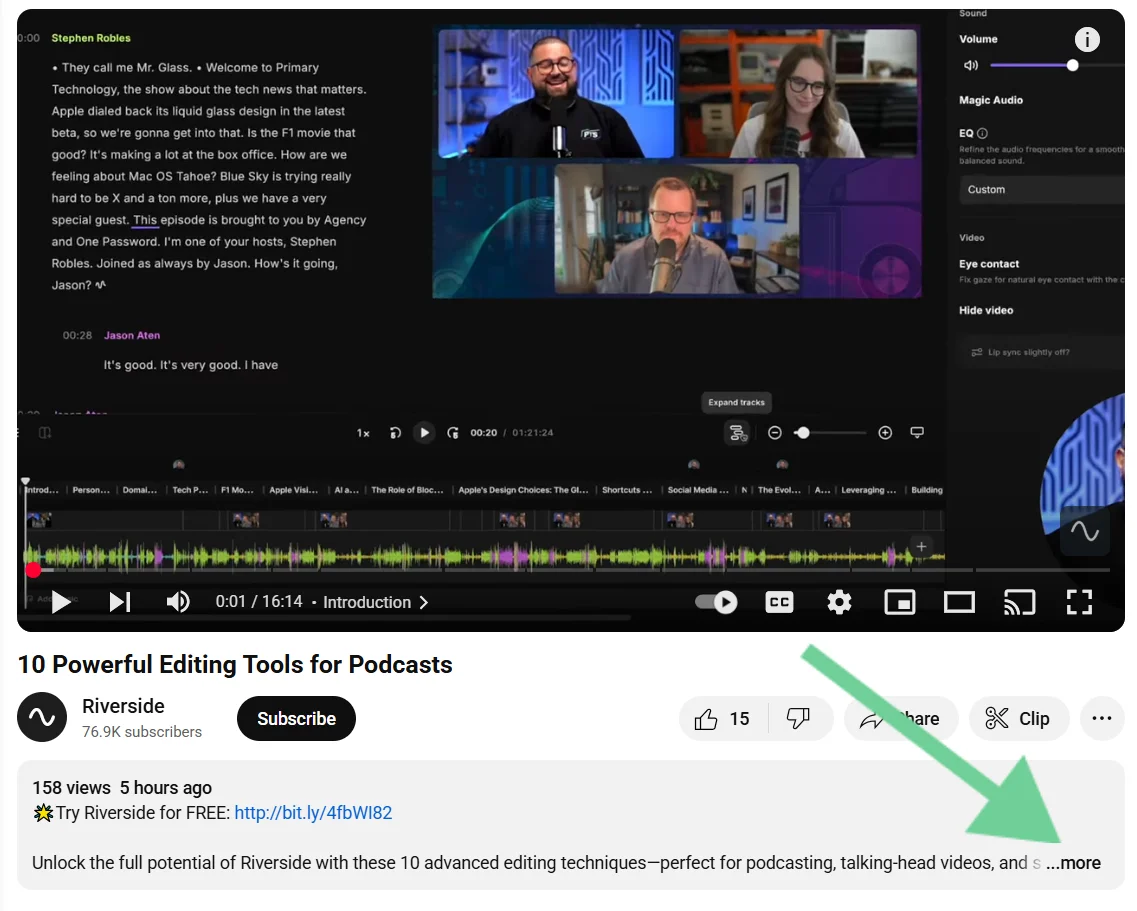
Step 1: Go to the YouTube video and click “more” in the video description.
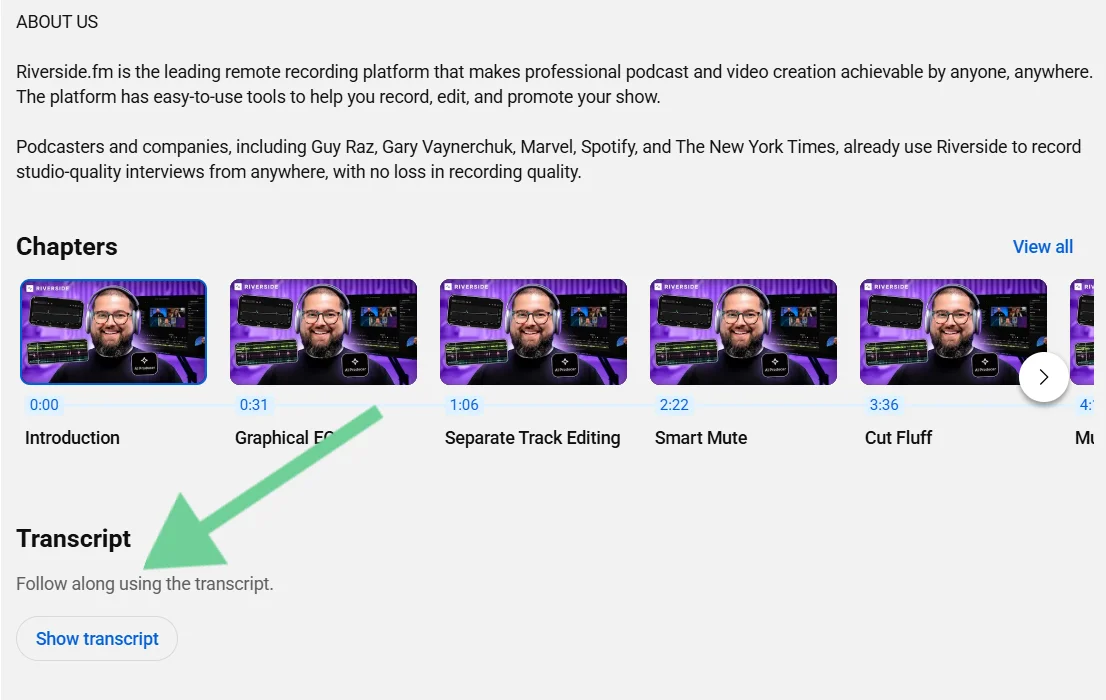
Step 2: Scroll down until you see the section labeled “Transcript.” Click the “Show transcript” button.
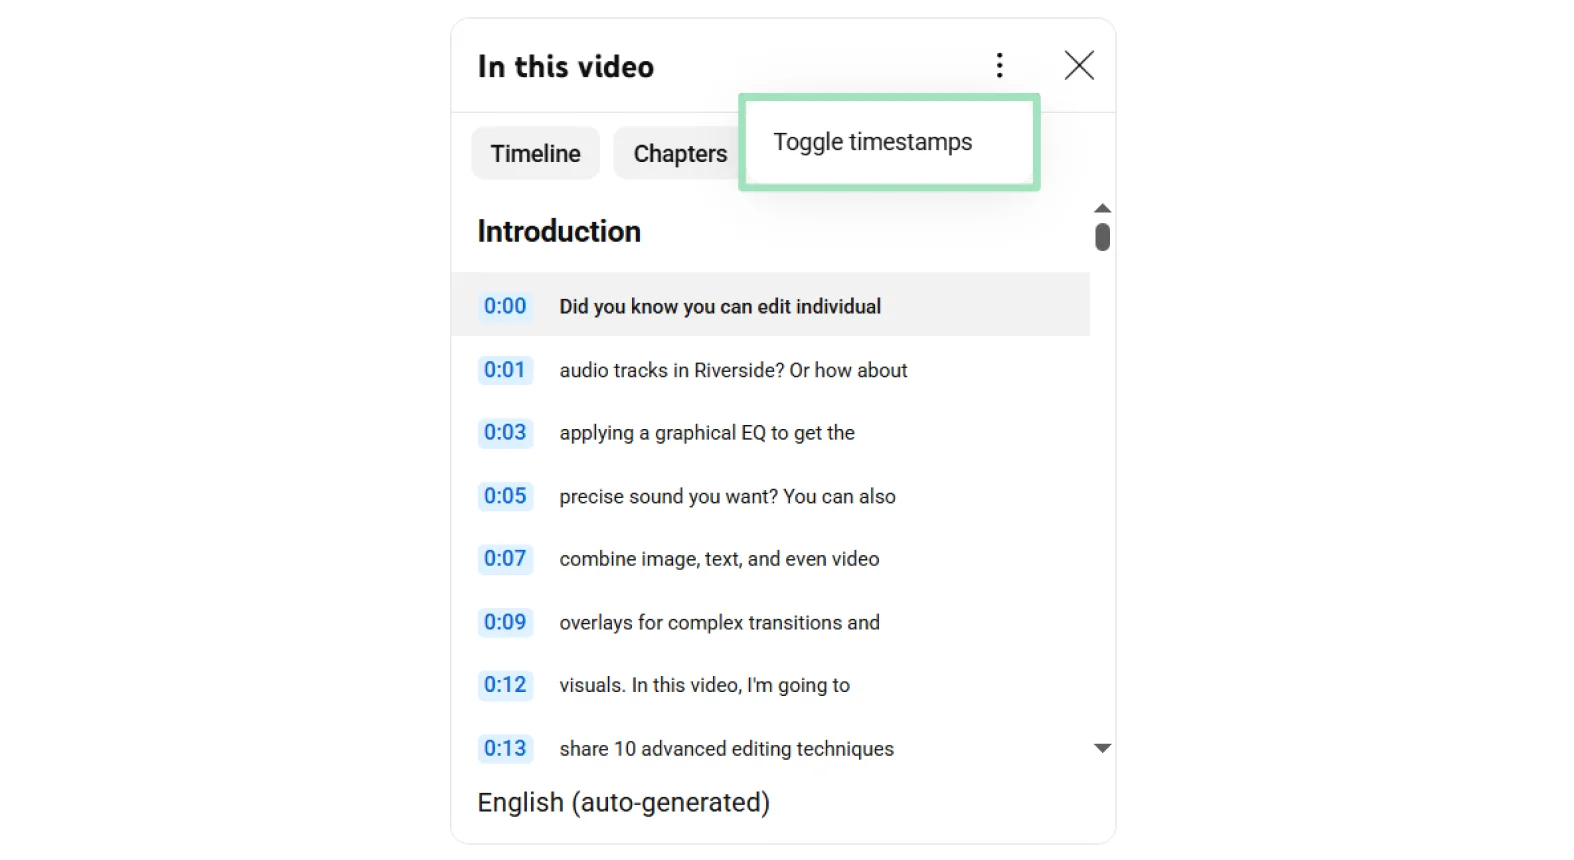
Step 3: You should now see the transcript to the right of the video player (or below it, if you’re on mobile). Click the three dots to see it with or without time stamps.
How to download a YouTube transcript as text
Now that you’ve found that transcript, you might want to download it. YouTube doesn’t provide a straightforward way to do that, but there are a few easy workarounds.
Here are your options:
Copy and paste the transcript text
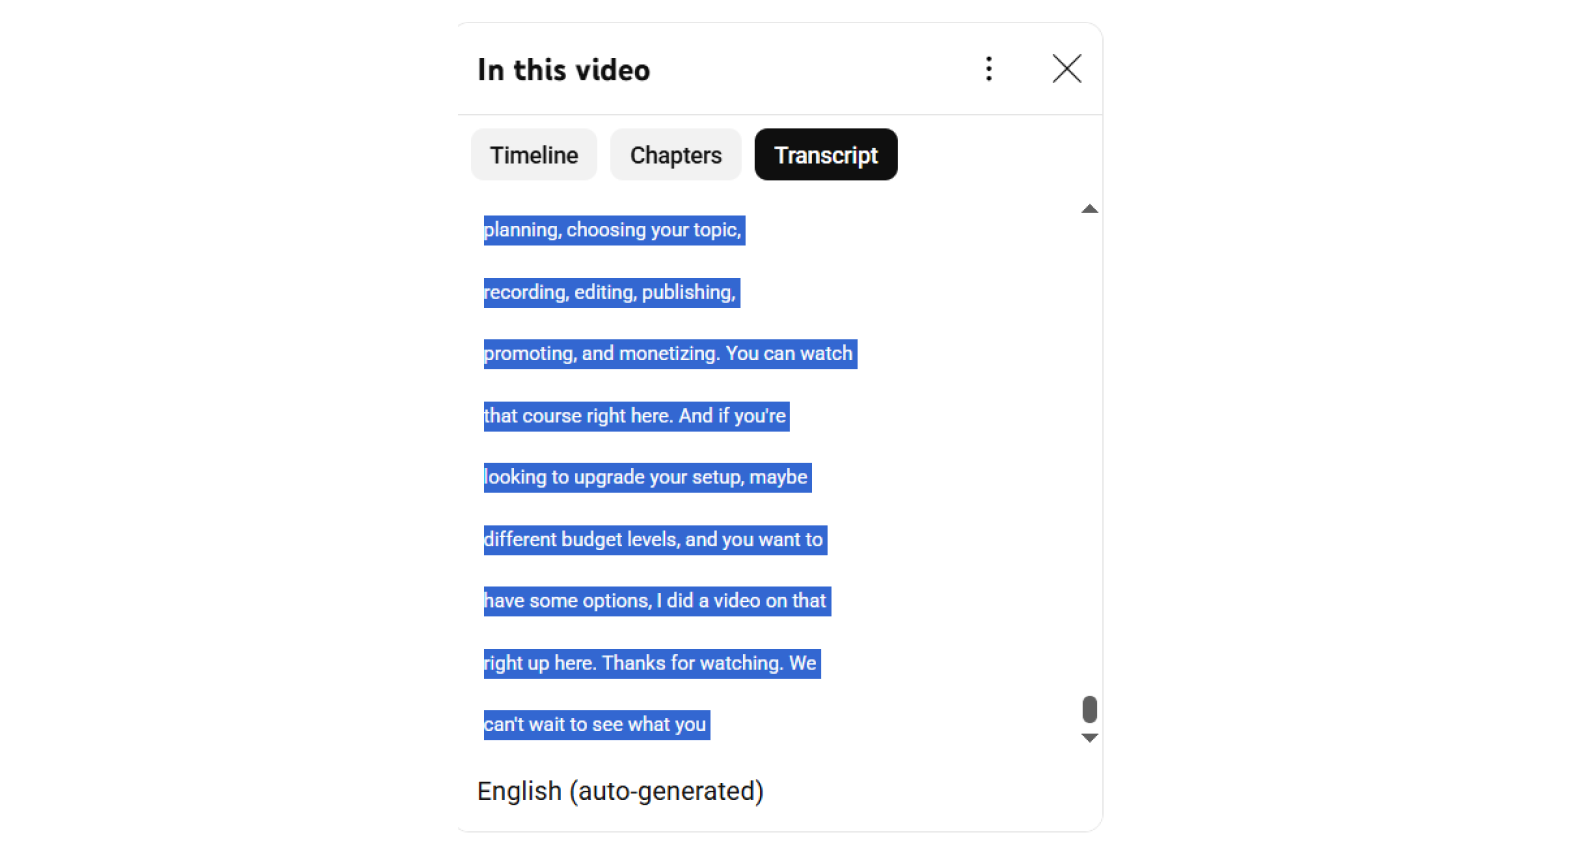
The easiest way to get the transcript text for a YouTube video is just to copy and paste it. Simply highlight the text, then copy and paste it into a doc.
Pros
- Fast and easy
- No tools or software required
Cons
- No formatting
- No grammar
- No speaker differentiation
YouTube transcript generators
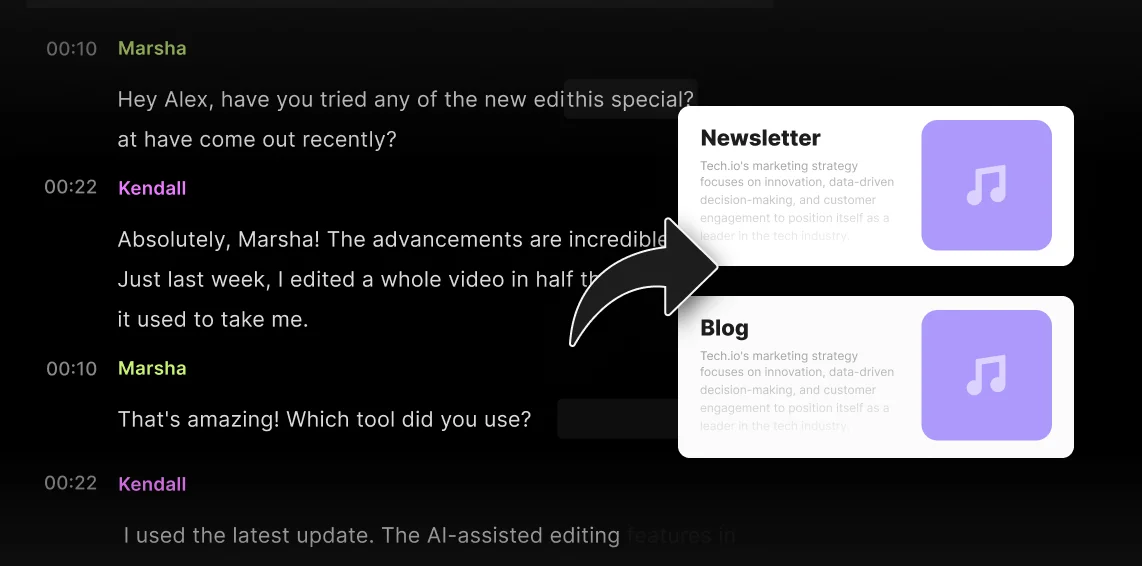
Copying and pasting works, but it’s quite rudimentary. If you want speed and smarter features, try one of the new transcript generators. With these tools, you can simply paste in the YouTube video link and get a transcript in seconds.
These tools don’t typically add formatting, but they usually let you search the transcript, get AI-powered summaries, and remove sponsored segments.
Riverside’s YouTube transcript generator gives you an up to 99% accurate transcript from a YouTube link in seconds, complete with formatting, punctuation, and speaker labels.
Pros
- Almost instant transcript generation from any YouTube link.
- Easy to use, no installs required.
- Bonus features like summaries and editing tools.
Cons
- Most third-party tools lack grammar, formatting, or speaker labels (unless you use Riverside)
- Quality and accuracy depend on language and video audio.
YouTube transcript browser extensions
If you prefer to work straight from your browser, another option is to use a Chrome extension to fetch YouTube transcripts. is by using a handy browser extension. Some even include time stamps and can translate the content into multiple languages.
Here are a few options:
- YouTube Transcript (Chrome): Automatically fetches the transcript with time stamps and built-in ChatGPT summarization.
- YouTube Transcript Generator (Chrome): Quickly transcribes YouTube videos from your browser with one click.
- Glasp: Features AI tools to help you highlight, summarize, and even translate content.
Pros
- Fast and effortless.
- Some offer additional AI tools.
- Timestamps and translations.
Cons
- Some extensions only work if the video has captions.
- Security concerns as some may track browsing history and other data.
- No speaker differentiation.
- Limited formatting.
AI transcription tools

If you want a cleaner, more accurate transcript of a YouTube video with punctuation, formatting, and speaker labels, you can use AI transcription tools. These tools like Google’s transcription “listen” to the audio and transcribe it in real time.
You can check our guide on how to use any of the Google’s transcription tools to do this.
Pros
- Transcripts are usually very accurate.
- Download as a TXT or SRT file.
- Free to use.
Cons
- You have to play the entire recording.
- Requires a quiet environment for best results.
- Can be a bit clunky to set up.
How to download a transcript for your own YouTube video
If you want a transcript from your own YouTube video, getting it is easier since you own the content.
Here’s how to do it:
Step 1: Log in to YouTube Studio.
Step 2: Click “Content” and select the video you want the transcript for.
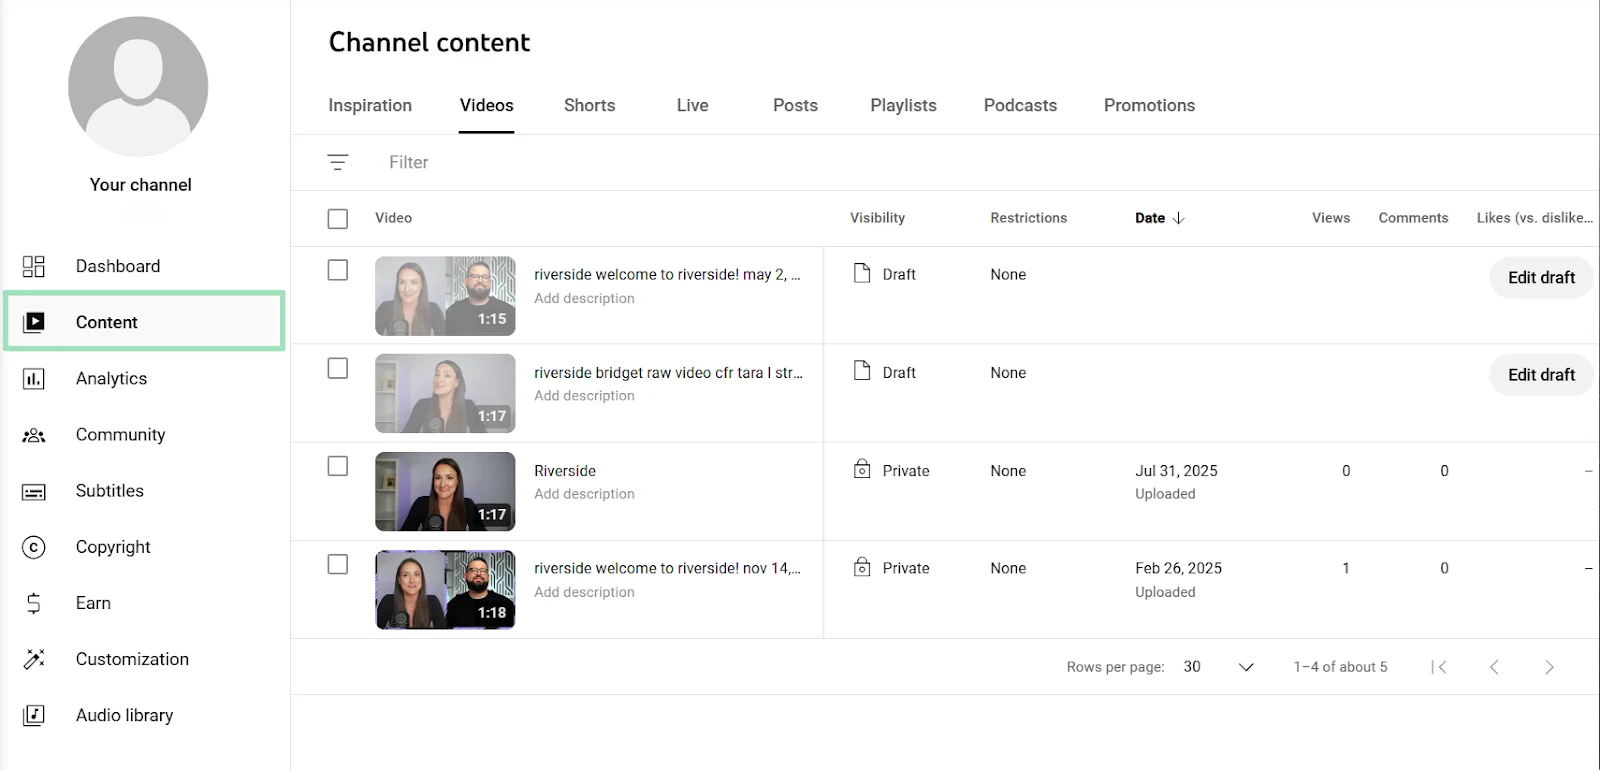
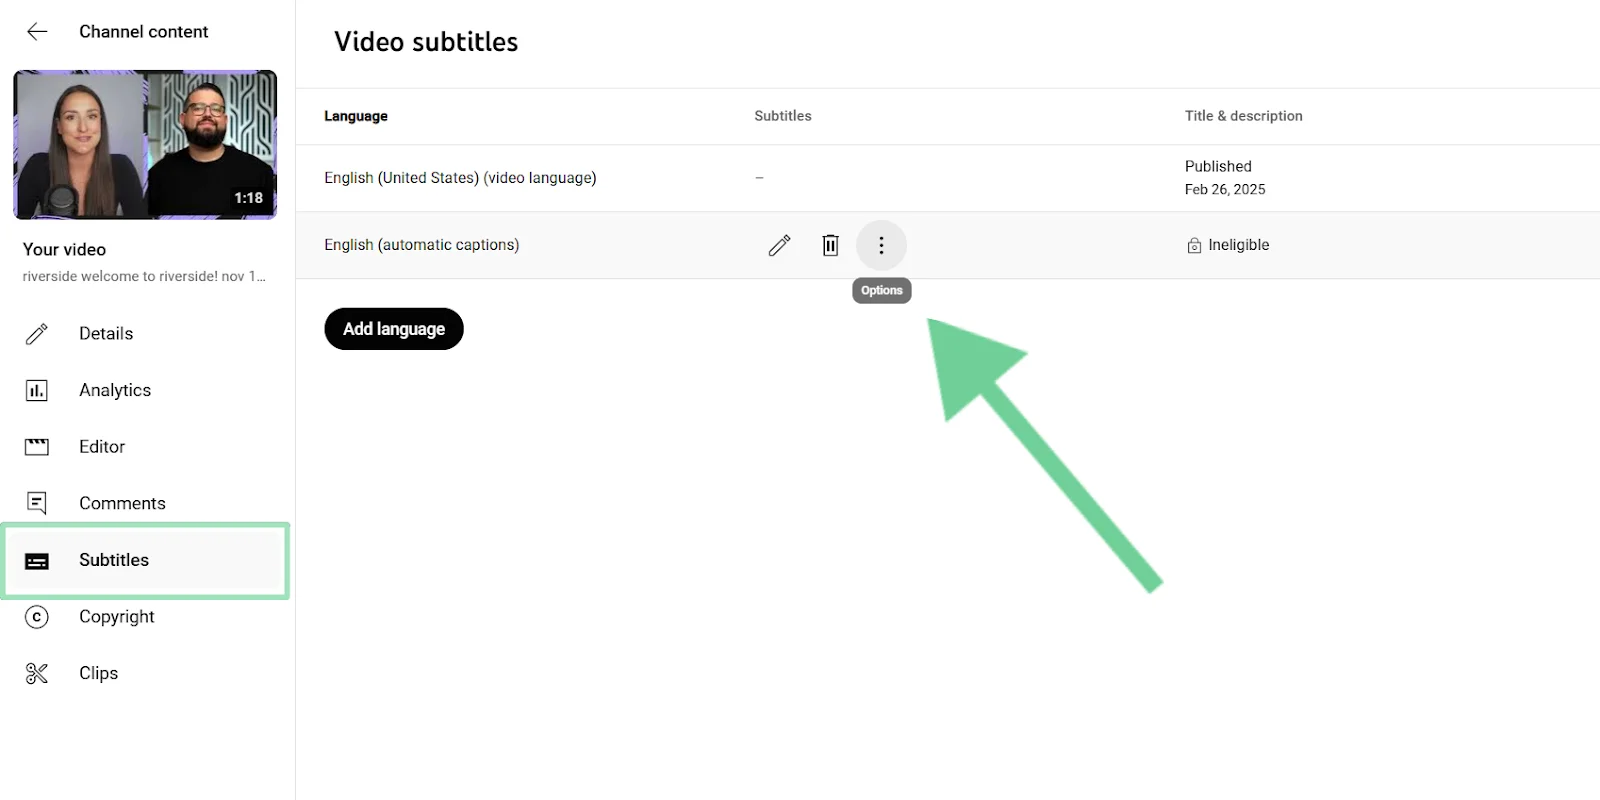
Step 3: Click “Subtitles” from the left sidebar. Then click the three dots to download your subtitles. You can download it as a VTT, SRT, or SBV file.
How to create transcripts for your own YouTube video
If you’re creating videos for YouTube, a transcript is a must. With it, you can:
- Make your video more accessible, both to people who can’t hear well and those who prefer to listen with the sound off.
- Improve your video’s search rankings (SEO) by making your content more crawlable by both Google and YouTube’s search engine.
- Increase engagement and watch time by allowing viewers to read along, improving retention metrics.
You’ve got two ways to create a transcript: either through YouTube’s built-in captioning feature orusing Riverside.
Here’s a look at both options.
Creating a transcript with YouTube’s caption feature
YouTube auto-generates a transcript for most videos
Step 1: Upload the video on YouTube.
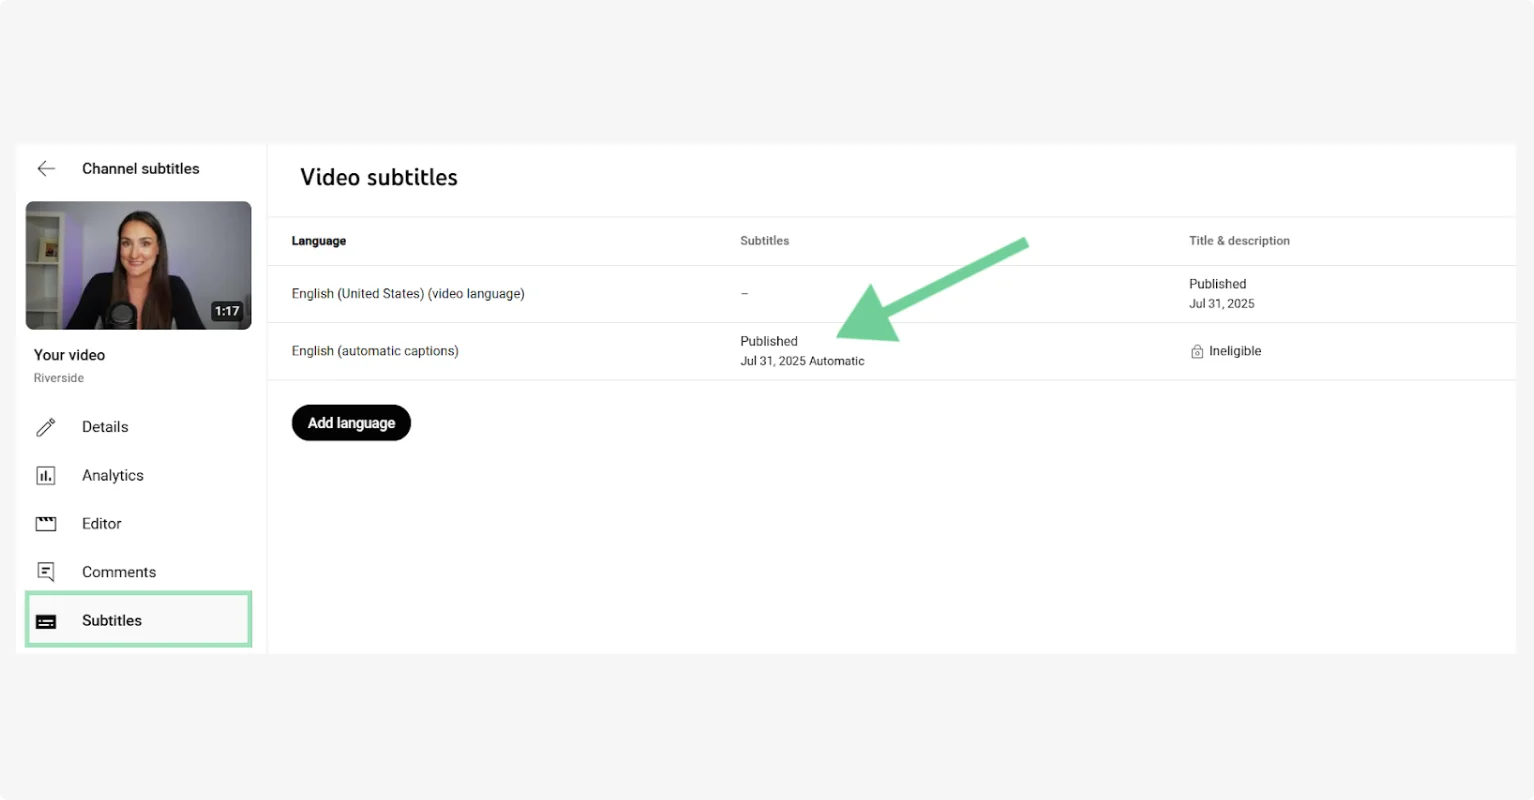
Step 2: Head over to “Subtitles” and click on one of your videos from the list.
Step 3: Hover over “Published.” Click “Edit” (pencil icon) to view or edit your transcript.
Generating YouTube transcripts in your content workflow
YouTube’s built-in transcripts are quick but they’re not very accurate, especially if there are multiple speakers.
With Riverside, you just need to paste a YouTube link to get up to 99% accurate transcripts, complete with speaker labels and proper formatting. Plus, you get all the high-quality recording and editing features you need to ensure your YouTube video looks and sounds amazing.
Here’s how to transcribe YouTube videos with Riverside with just a link:
Step 1: Sign up or log in to Riverside.
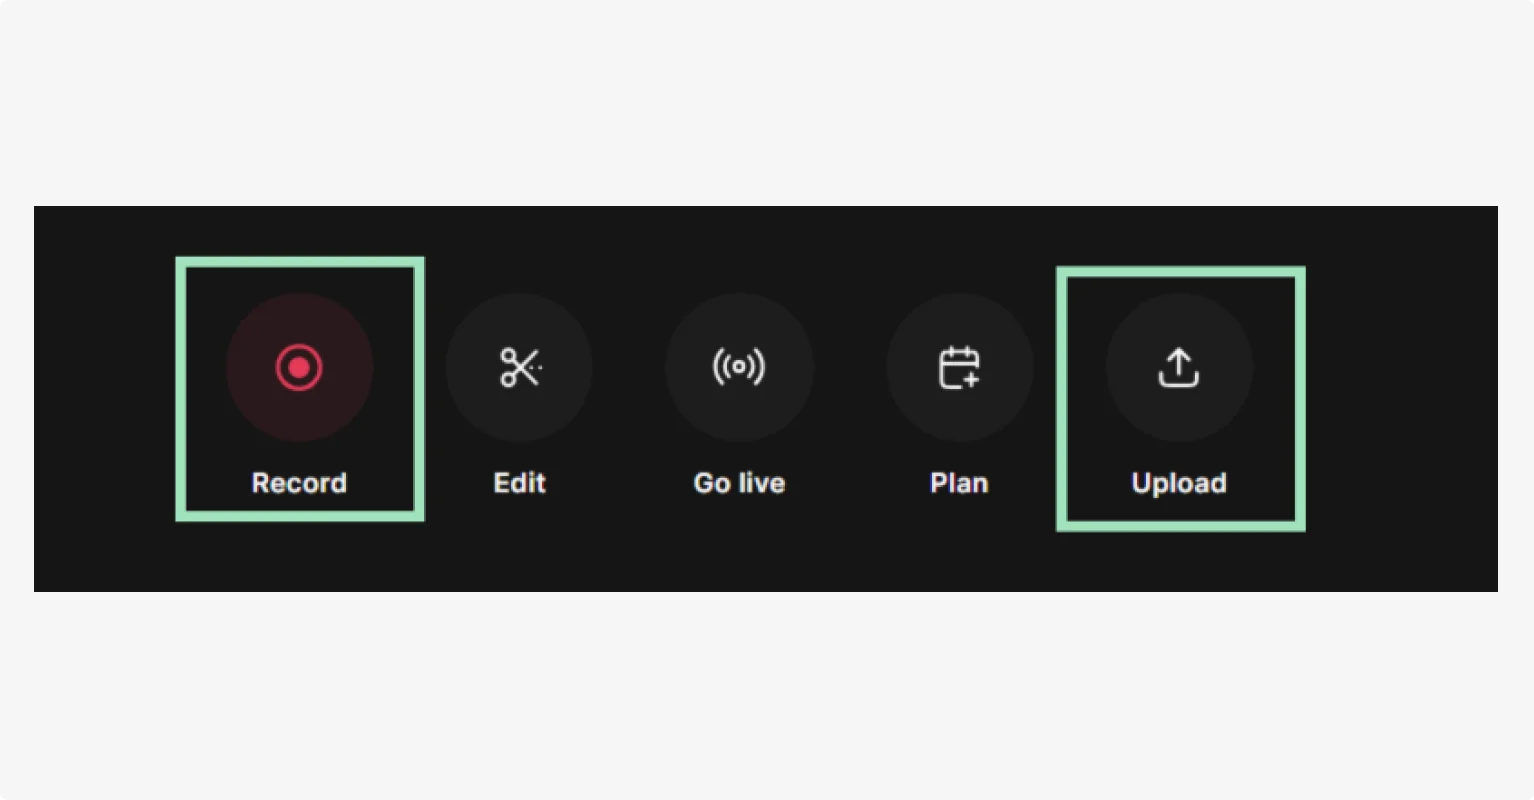
Step 2: Click “Upload” then select “Paste YouTube link.”, Your transcript will be available within a few minutes.
You can also click “Record” if you want to record your own video in up to 4K video and 48kHZ audio quality.
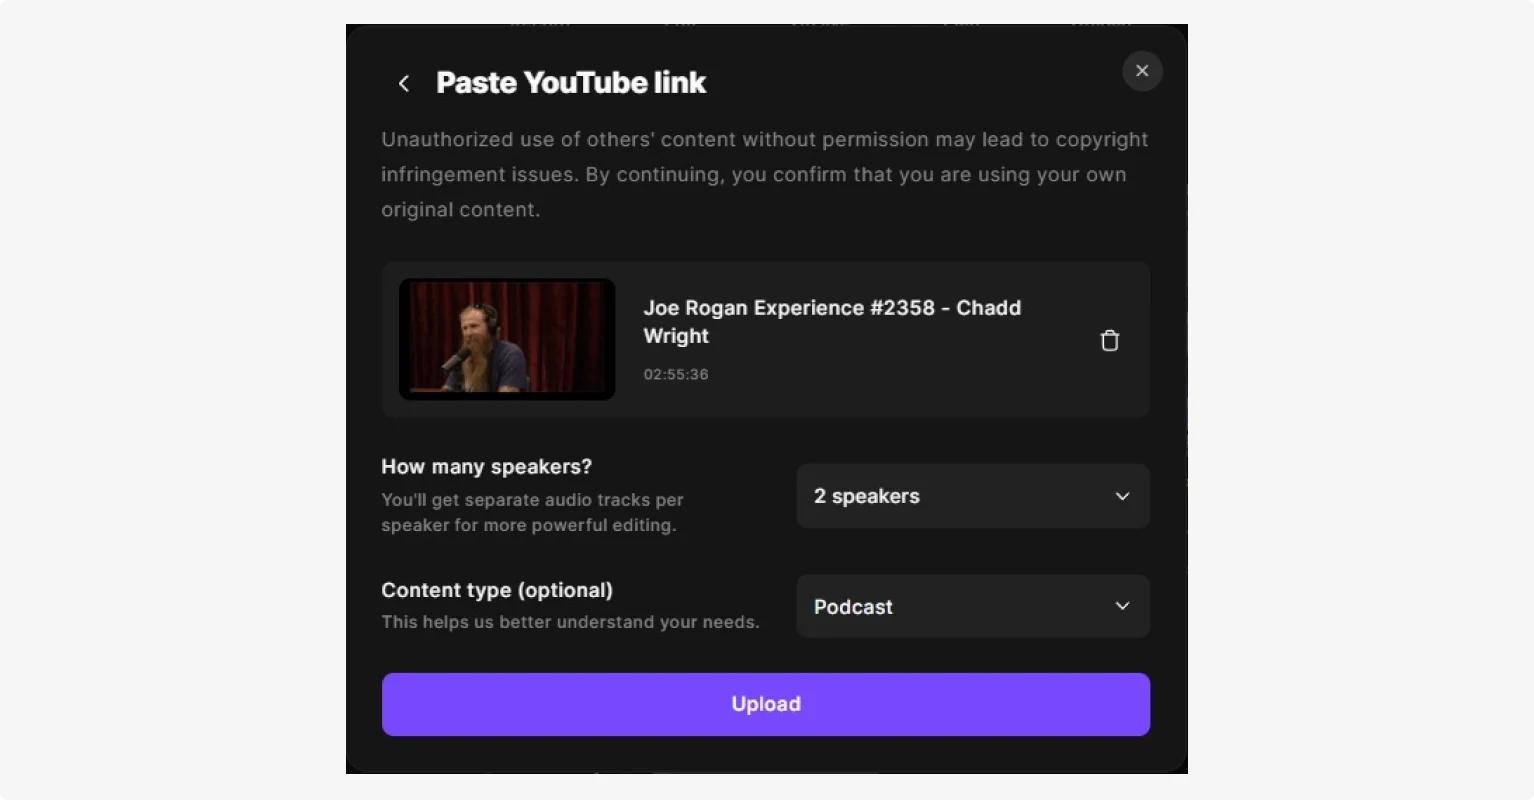
Step 3: A preview of your video will appear. Select the number of speakers and the type of content (optional), then click “Upload.”
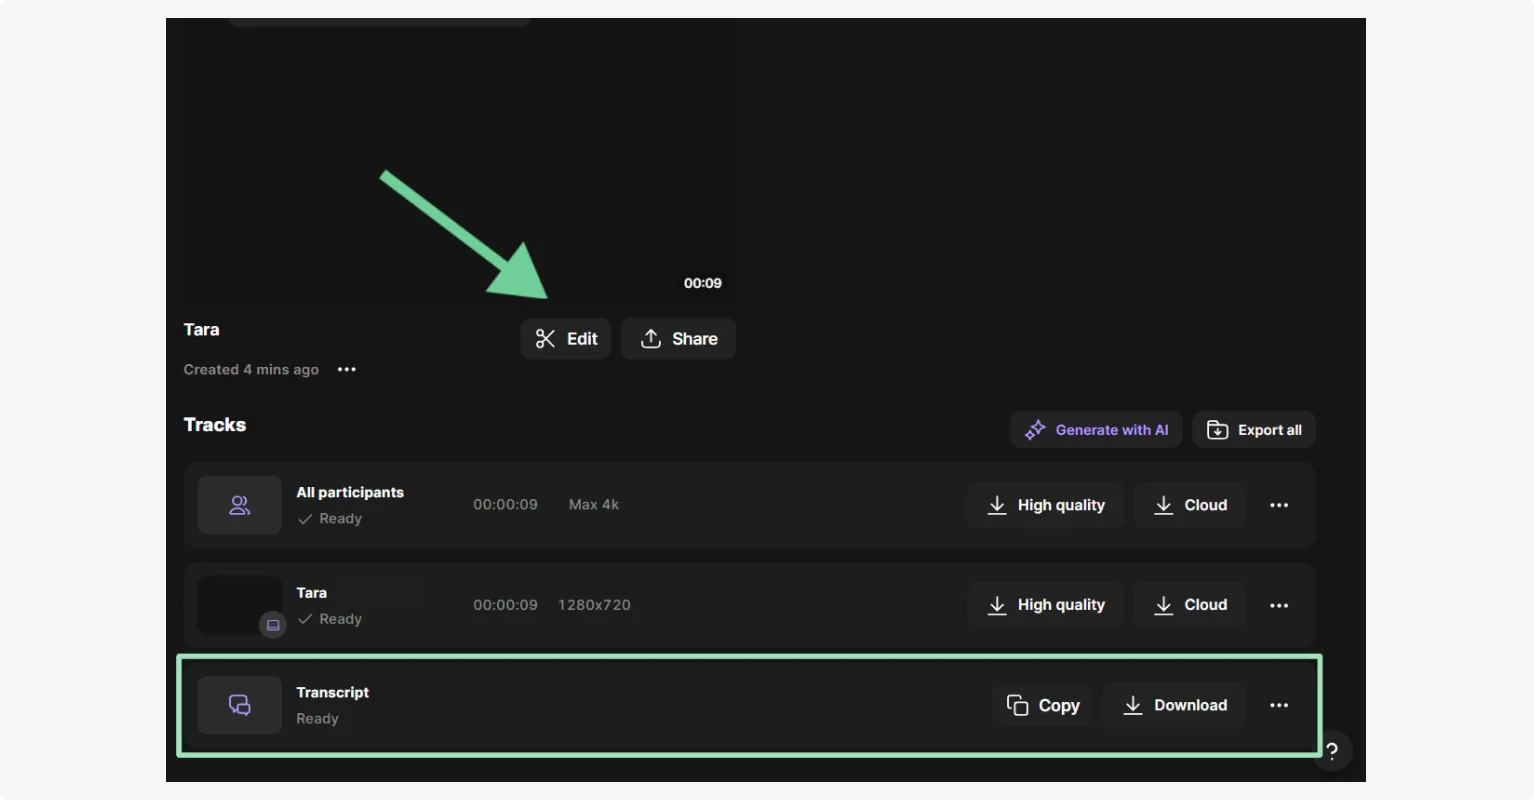
Step 4: Once the transcript is ready, you will get a notification email. First download your transcript (you’ll need it for later), then click “Edit” to go to the editor.
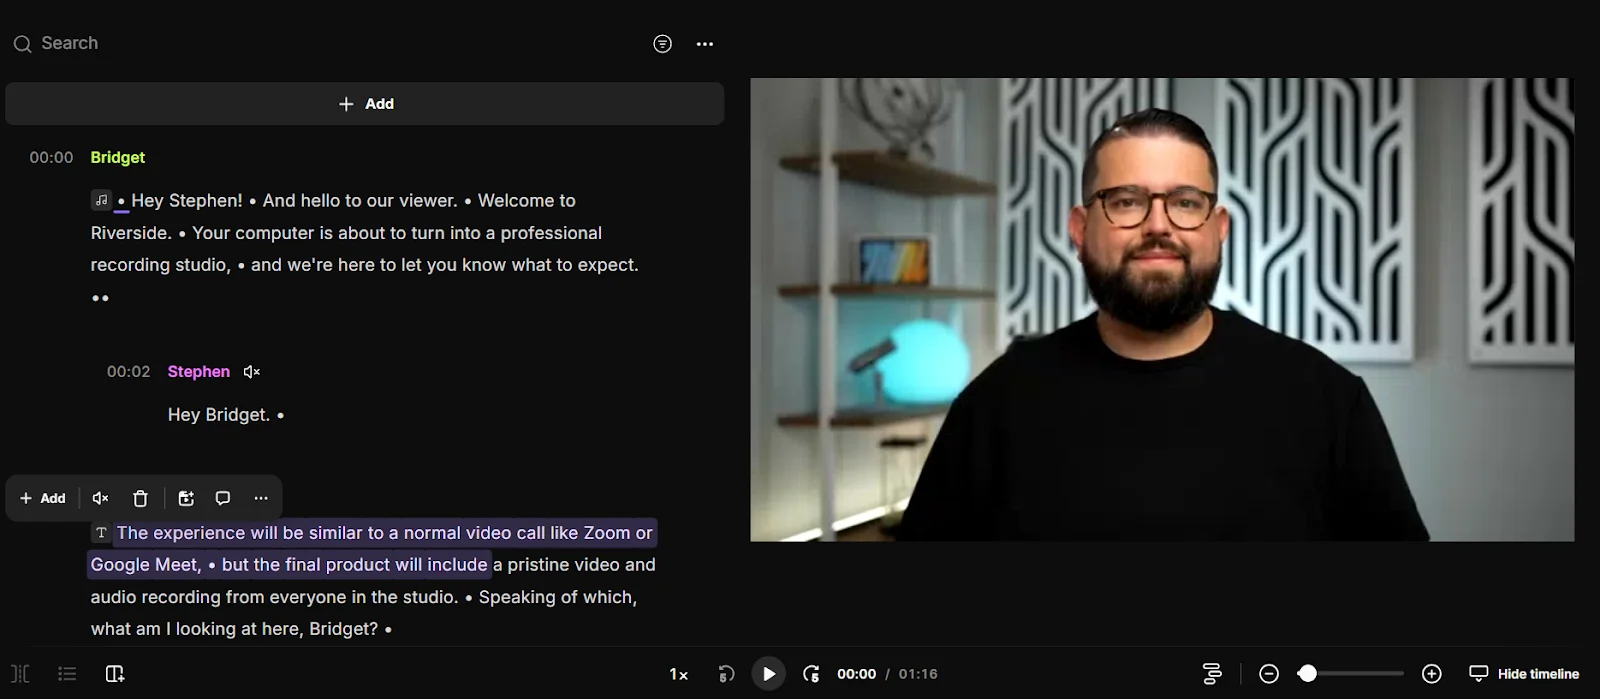
Step 5: From the Riverside text-based editor, you can make quick changes to your transcript, and your video will update accordingly.
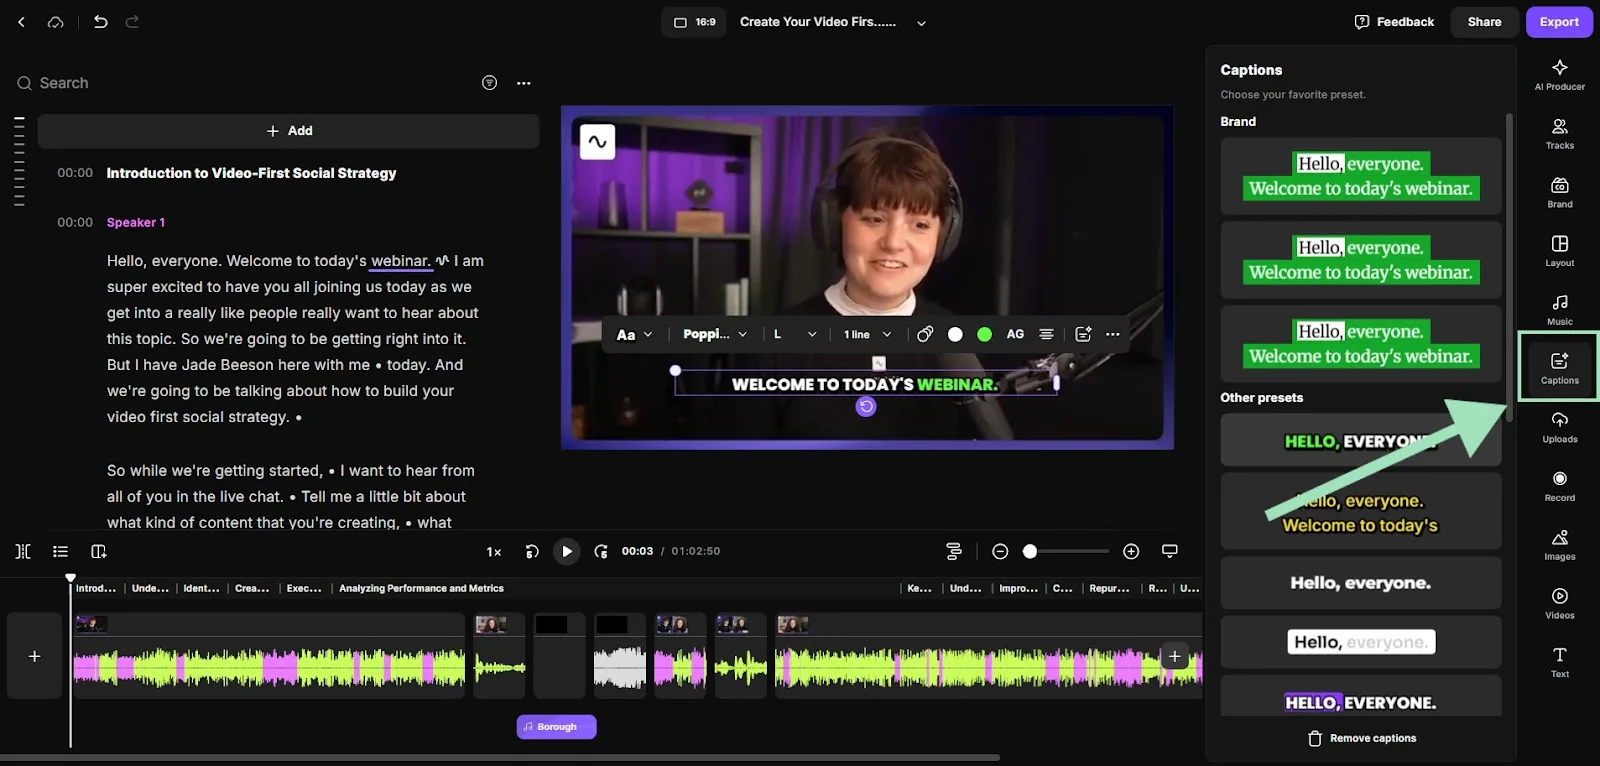
Step 6: You can also use your transcript to make quick, customizable captions that look way better than the auto-generated ones on YouTube.
Just click on the “Captions” tab on the right sidebar, style your captions and they will be automatically added to the video.
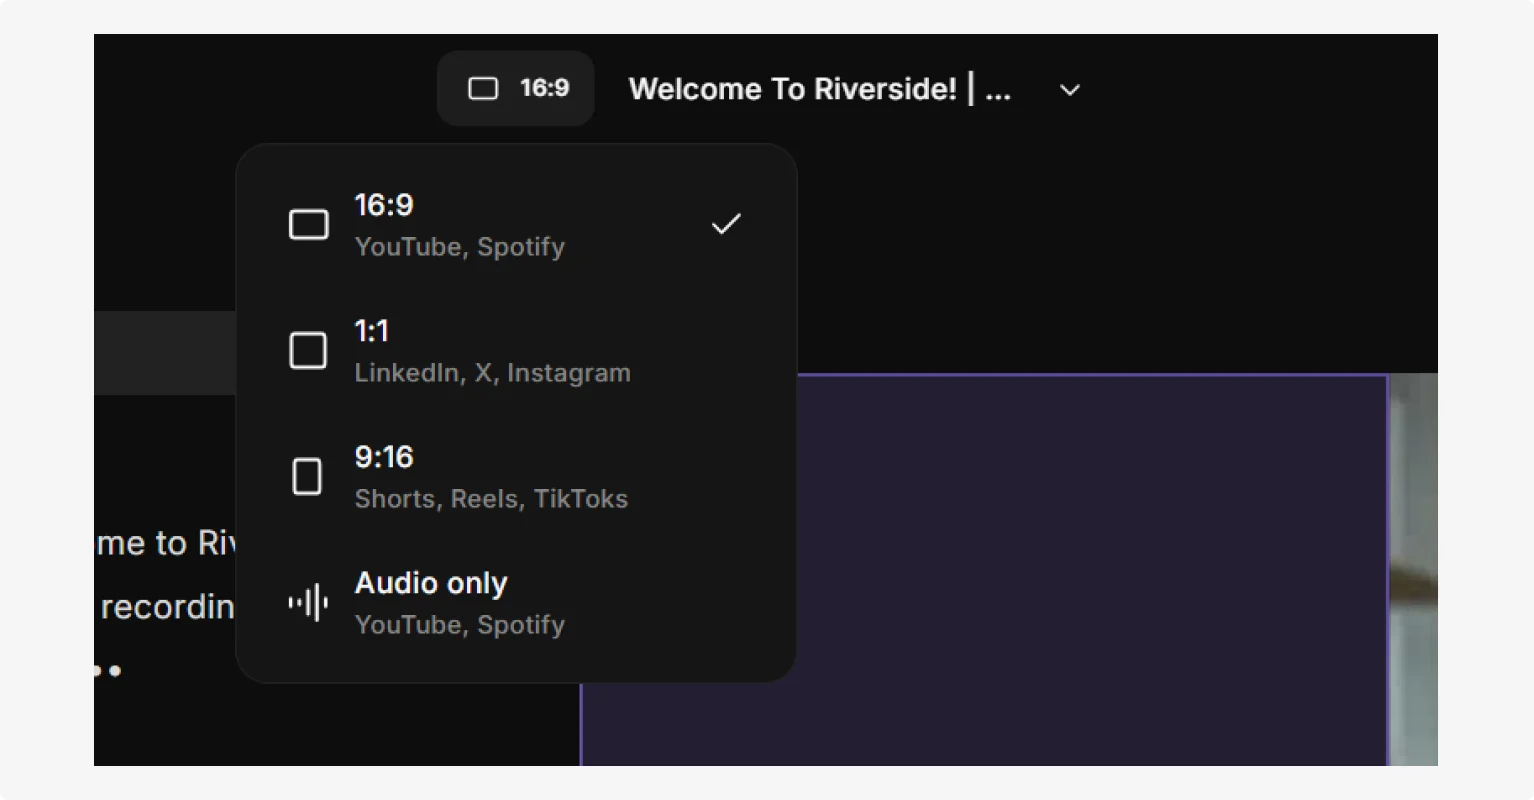
Step 7: Make sure your video is in YouTube format using the toggle at the top of your screen.
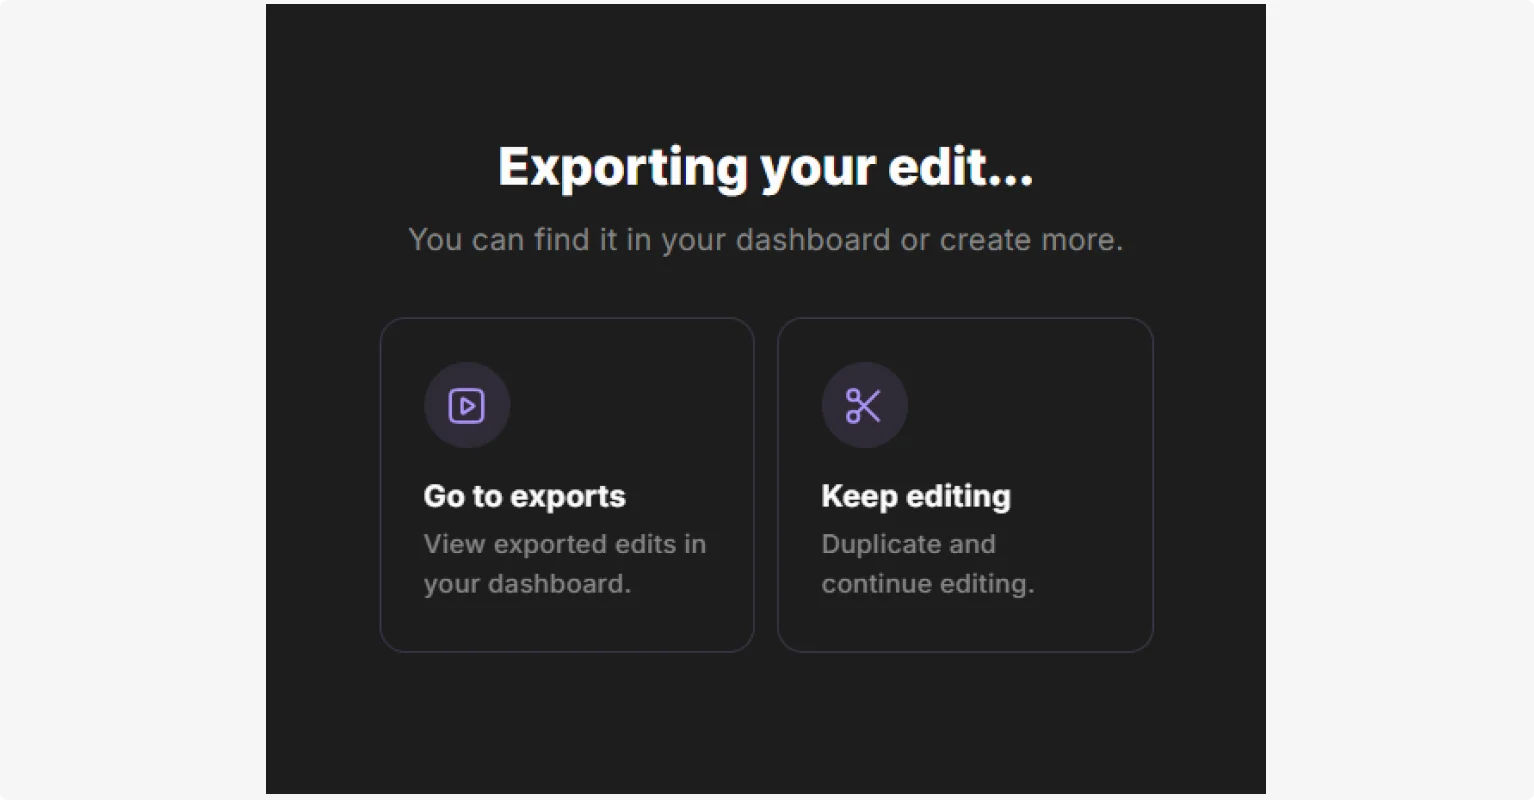
Step 8: When you’re done editing, click on the “Export” button on the upper right corner, select your quality, then confirm by clicking on “Export video.”

Step 9: To jump straight to your newly exported video, click on “Go to Exports” or go back to your dashboard to find it.
Step 10: Next, log in to YouTube Studio. Upload your video or go to “Content” to find an existing video.
Step 11: Click “Edit” (the pencil) for your video and click “Subtitles.”
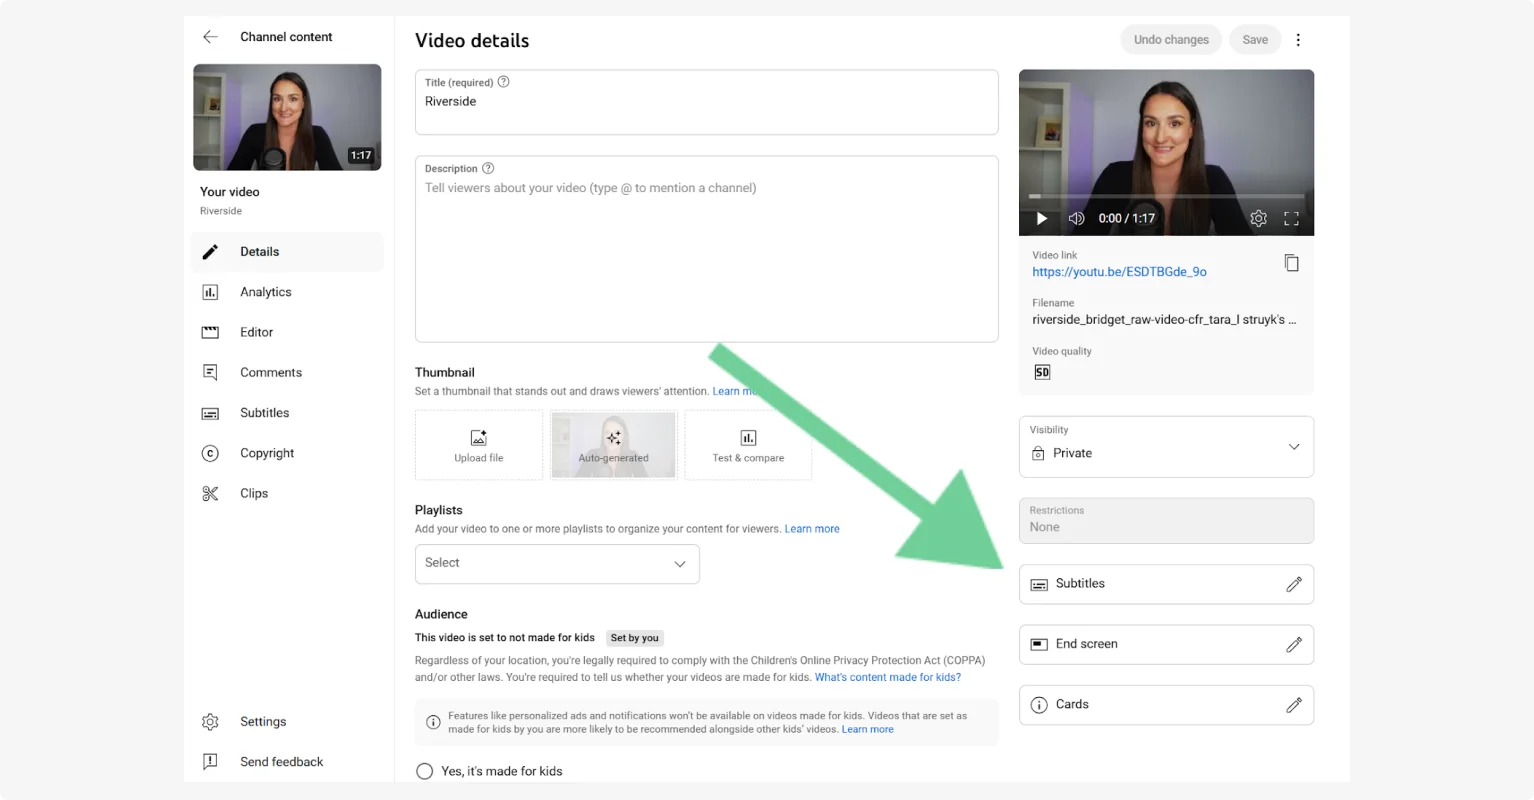
Step 12: Click “Upload file” to add the transcript file you downloaded from Riverside earlier on. Your transcript will include time stamps, so it should be perfectly synced to your video.
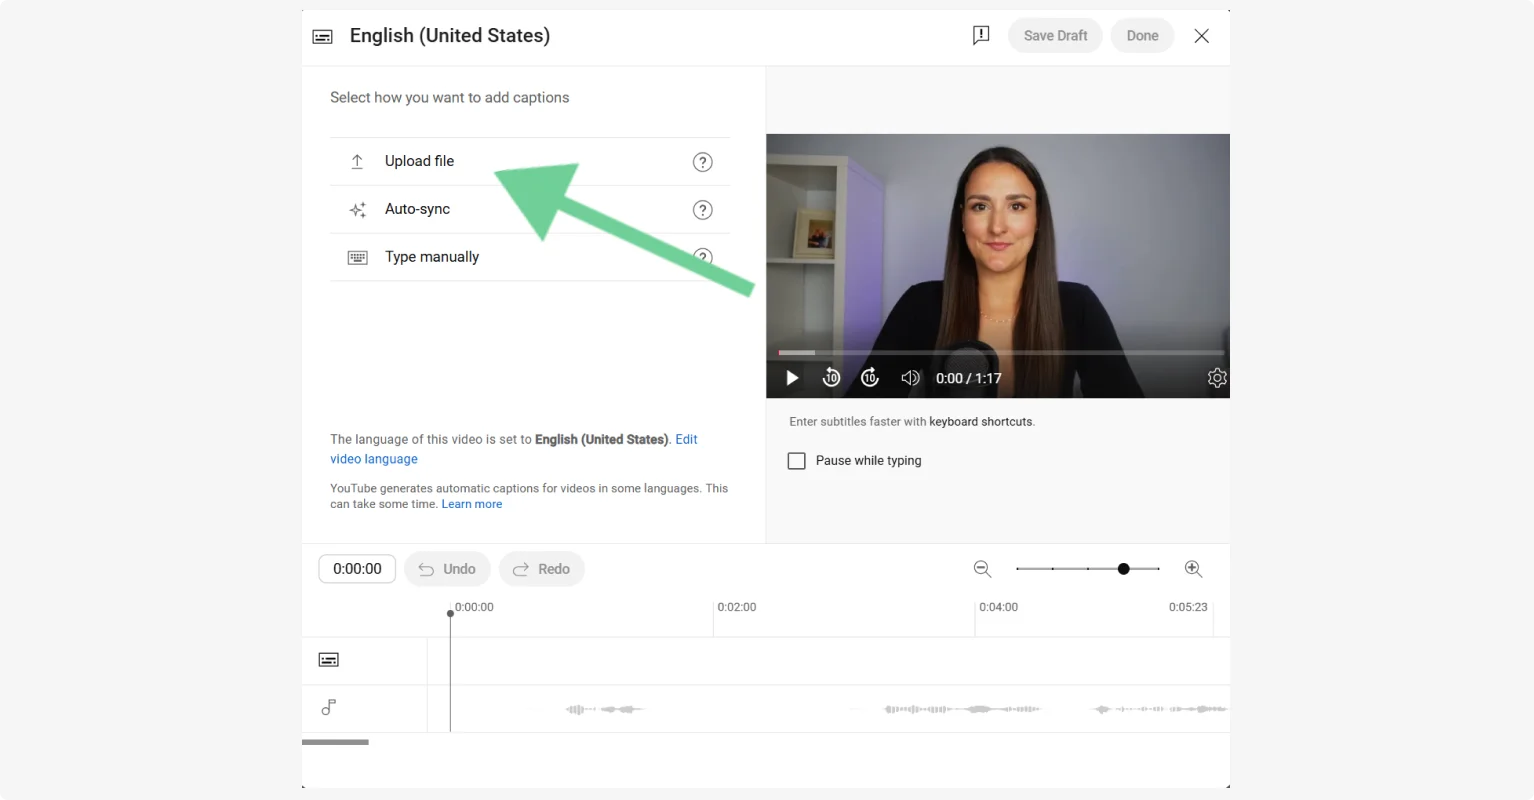
That’s all you need to do! And, if you recorded it with Riverside, you’ll get higher quality audio and video too (You can thank us later).
Tips for creating transcripts for YouTube
Now that you know how to create a transcript for YouTube, you’ll want to make sure its quality is as high as possible.
Here are a few tips:
- Record in high quality: The quality of your audio recording directly influences the accuracy of your transcript. Use a professional microphone for the clearest sound possible and record with a dedicated software like Riverside that doesn’t compress audio.
- Reduce background noise: Not only is background noise distracting, but it can also throw off AI transcribers. Record in a quiet space or use acoustic panels. If your room creates echo, toggle on “noise reduction” and “echo cancellation” while recording with Riverside to improve recording quality.
- Speak up and speak clearly: Position your mic correctly and speak at a steady pace. Again, the clearer the recording, the better the transcript!
- Edit for accuracy: Before uploading a transcript to YouTube, it’s a good idea to check it for accuracy. Edit any sections the transcriber may have misinterpreted and make your captions look clean and professional.
- Add accurate timestamps: If you want to use your transcript for captioning, you’ll need accurate timestamps. Make sure any transcription tool you use adds them automatically, like Riverside. You can add them manually through YouTube’s editor, but it’s a tedious and time-consuming job.
- Consider speaker labeling: Transcripts are easier to follow when you can clearly identify who’s speaking. Speaker labeling makes content more accessible and scannable (Riverside does it automatically.)
- Preview on YouTube: Once you’ve uploaded your video on YouTube, preview your transcript or captions and make sure everything is synced and accurate. It’s worth the extra step.
FAQs about YouTube transcripts
How can I get YouTube transcripts in other languages?
If you’re watching a YouTube video, you can auto-translate the captions. Just follow these steps:
- Click the gear icon on the bottom right of the video screen.
- Click “Subtitles” then select “Auto-translate.”
- Choose your preferred language.
This translates captions on-screen, but does not provide a downloadable transcript. You could also use a YouTube transcript generator to download a transcript in English, then translate it with an AI tool like Google Translate or DeepL.
If you’re a creator, note that you can upload transcripts in multiple languages to YouTube.
- Go to YouTube Studio and select “Subtitles.”
- Click on the video you want to add subtitles to.
- Select “Add language.” You can now upload a file in another language.
Can I use AI to generate a YouTube transcript?
Yes. Nearly all of the tools used to generate YouTube transcripts options employ AI. YouTube auto-captions, video transcript generators like Riverside, and even browser extensions use AI-powered speech recognition.
If you want to create a fast and accurate transcript, the easiest way to do it is with Riverside Here AI is even used to remove background noise and improve audio clarity in your recording to maximize the quality of the transcript.
While you can create transcripts manually, we don’t recommend it. It’s tedious, time consuming, and today’s AI-powered tools can do a great job quickly and with zero effort.
Can I get a YouTube transcript for free?
Yes! All of the tools and options here allow you to get a YouTube transcript for free. You can use several tools and extensions to get a transcript from an existing video. You can also create a transcript for free using Riverside’s free transcriber tool.


-(1).webp)

.webp)


