


Key takeaways:
- Podcast success on YouTube comes down to choosing a topic that engages audiences, deciding on a format, and maintaining a consistent episode cadence.
- YouTube organizes podcasts in playlists so users understand which episodes go together.
- To get your podcast onto YouTube, you can import an existing show using your RSS feed or start a brand new one.
- All you need to get started is a content plan, recording equipment, editing software, and a YouTube channel.
I’ve been podcasting for over 15 years and host Primary Technology, a tech-focused show with over 300,000 downloads. In that time, I’ve worked across audio, video, and live formats. But, YouTube is the channel that changed how I think about podcasting the most.
YouTube rewards watch time, relevance, and consistency far more than downloads. That changes how you plan and structure your show from the very beginning.
In this guide, I’ll show you how to start a podcast on YouTube the right way, including what actually drives growth and what I’d do differently if I were starting today.
How to start a YouTube podcast from scratch
Since your episodes will end up on YouTube anyway, why not start there from day one? YouTube has a huge audience and provides detailed analytics to help you understand them better. Here’s a step-by-step walkthrough on how to get started.
Planning your YouTube podcast
Get clear on what your show is actually about and who it’s for. The biggest mistake I see is trying to make a podcast for ‘everyone.’ That usually means it connects with no one.
Ask yourself:
- Who is this content for?
- What problem or curiosity does it address?
- Why would someone come back for another episode?
YouTube favors channels with a clear lane. When your topic and audience are consistent, the algorithm understands where to place your content and viewers know why they should subscribe.
Choose a podcast topic
Pick a topic you can talk about for a long time without forcing it. Trends fade fast, but expertise compounds. If you’re already answering the same questions on calls, in DMs, or at work, that’s usually a good starting point, according to Jade Beason, Founder of The Creator Project, YouTube Creator Class Valedictorian, Class of 2022.
“What are the things your audience finds annoying or irritating in your niche?” Beason encourages creators to ask themselves. “Once you identify those pain points, you can create content that solves them, and that’s often the most valuable content you can produce.”
Strong YouTube podcasts sit at the intersection of:
- Something you genuinely know well.
- Something people actively search for.
- Something you can explore from multiple angles over time.
You should also consider choosing a niche or hyper-focused topic, at least at first. This helps ensure that your audience is interested in each episode.
For example, if your podcast is about cooking, you might attract an audience that’s totally into your salad recipe, but doesn’t want to hear about cooking meat. If you focus on a specific type of cooking, you’re more likely to get repeat viewers/listeners.
If you need a creative jumpstart, take a look at our guide of 100+ podcast topic ideas for inspiration and more tips on how to choose your topic.
Decide on a podcast format and structure
Your podcast format shapes everything that follows. Here are the main formats to consider:
- Interview-based podcasts. You are the host and invite interesting people to join you on the podcast. For example, you can interview experts and special guests.
- Talk shows. This is where you and maybe one other host discuss specific topics together. The end product is an engaging episode covering that subject matter.
- Informational podcasts. Want to take a deep dive into a particular subject matter? Informative podcasts are the way to go. Often, there’ll be one host who researches and shares in-depth information about a particular subject.
- Educational content. Think of this like teaching, not just informing. Tutorials, how-tos, or anything that walks listeners through how to do something can .
For YouTube specifically, podcast structure matters more than length.
Episodes that are easy to scan with clear topics, pacing, and chapter markers perform better eventually. Even long-form shows can perform well when viewers quickly understand what they’ll get from the episode.
You also need to decide how visual your show will be. Some podcasts work just fine with a static camera and strong audio. Others need screen sharing, demos, or guest visuals to make sense on YouTube.
Set your publishing schedule
Consistency matters more than frequency. Weekly is great if you can sustain it. Biweekly is fine if that’s realistic. What matters is showing up when people expect you.
The type of podcast you create may also determine your cadence. For example, short podcasts may come out daily, while longer ones may have a larger gap between episodes.
YouTube's algorithm tends to reward predictable publishing patterns. It also helps your audience build a listening habit around your show. Pick a cadence you can maintain for at least a few months without burning out.
Read more: Check out our full guide on how to schedule a podcast.
Step 2: Build your YouTube podcast setup
Your setup doesn’t need to be complicated, but it does need to be reliable. Start with the basics and build from there.
At a minimum, you’ll need:
- Microphone: A solid mic is non-negotiable. The Samson Q2U is a great, affordable USB/XLR option. If you want an upgrade, try the Shure MV7.
- Camera: You don’t need a high-end camera. A modern smartphone works just about as well. Mount it on a tripod and you’re set. Youcancheckourguid on how to use your phone as a webcam.
- Headphones: Optional, but helpful. Closed-back headphones like the Audio-Technica ATH-M40x reduce echo and audio bleed. Go with something comfortable that you can wear for long recordings.
- Lighting: Soft, even lighting makes a huge difference. If you don’t want to invest in a full 3-point lighting setup, just buy an inexpensive LED light on Amazon and attach it to your monitor or camera with a clamp.
- Recording accessories: You can always invest in accessories later to complete your setup. For instance, a mic arm or stand helps with positioning, while a pop filter can minimize harsh sounds.
- Video and audio editing software: You’ll need software to record and edit a podcast. While you can stitch together multiple tools, I recommend using an all-in-one platform like Riverside to simplify the entire process. It lets you:
- Record up to 9 remote guests.
- Edit your recording like a document with the text-based editor.
- Clean up audio in a single click.
- Quickly turn podcast highlights into YouTube Shorts with Magic Clips.
Check out our full podcast equipment guide to learn more.
Bonus checklist: Download this podcast production checklist and learn how to streamline your planning process directly from Focus and Bloom Studios.
Step 3: Create your podcast for YouTube
Recording for YouTube means working with video, remote guests, and edits that often happen later. So, you’ll want a setup that gives you clean audio and video without creating extra work.
Let’s look at how to record and edit a podcast for YouTube.
Note: When you’re starting out, don’t worry about making a perfect episode. That comes later. Your first few recordings are about getting comfortable on camera and learning what works for you on YouTube.
Recording your podcast
Start by making the point of the episode clear early on. In the first minute, viewers should understand what the conversation is about and whether it’s worth their time.
As the conversation unfolds, think in sections rather than one long take. Clear questions, topic shifts, or natural pauses give your episode shape. They also make it easier to add chapters later, which helps viewers navigate and improves discoverability on YouTube.
Visual presence matters more on YouTube than on audio-only platforms. Look at the camera when you’re making key points and avoid long stretches where nothing visually changes. Small resets, like a guest response or a quick screen share, help keep attention.
To support this workflow, you need a tool that doesn’t depend on a perfectly stable internet connection for stellar results.
Riverside records each participant locally, so quality holds up even if someone’s connection dips. Guests can join with a link, and each person’s audio and video capture as separate tracks, giving you more control later.
Here’s how to record a video podcast on Riverside:
Step 1: Join or log in to Riverside. Click “+” in the left-hand sidebar, then select “New Studio” to create your virtual studio.
Step 2: Name your studio in the form that appears, then click “Create.”
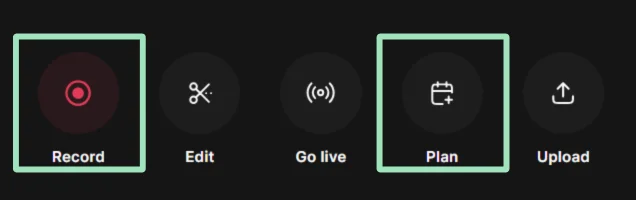
Step 3: Inside the studio dashboard, either schedule a session from the “Plan” tab or click “Record” to start right away. This takes you to the lobby, where you can test your equipment, framing, and lighting.
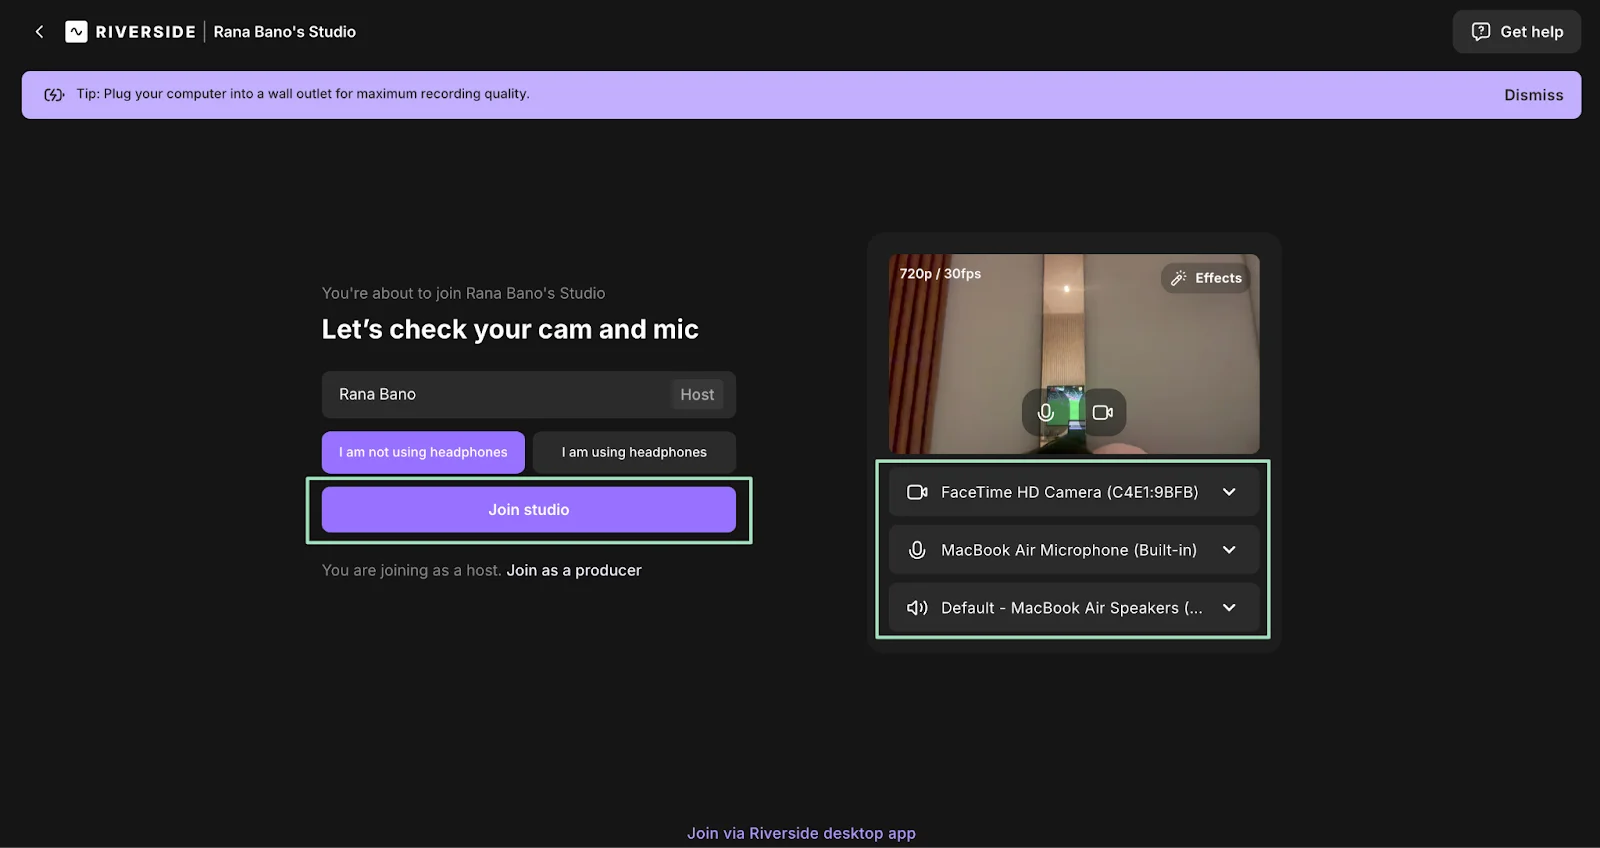
Step 4: Confirm your camera and microphone using the dropdown menus, then select “Join studio.”
Step 5: Invite your guests by sharing the studio link. They don't need to sign up for Riverside or install any software.
Step 6: When everyone is ready, click the red “Record” button to start. While recording, you can use the Media Board to add live sound effects or share presentations.

Bonus: Use the teleprompter (“Script”) feature to keep notes, questions, or talking points visible while you record.
Step 7: Click “Stop” when you’re finished recording.
Editing your podcast
Start by cutting long pauses, repeated points, and side conversations that don’t move the episode forward. Use chapter markers to help viewers jump to the parts they want to listen and give YouTube clearer context. You can also add captions or simple overlays to reset attention when a segment runs long.
Riverside keeps editing close to recording. You can open your session to trim, rearrange, and clean up audio and video in the same workspace. Here’s how:
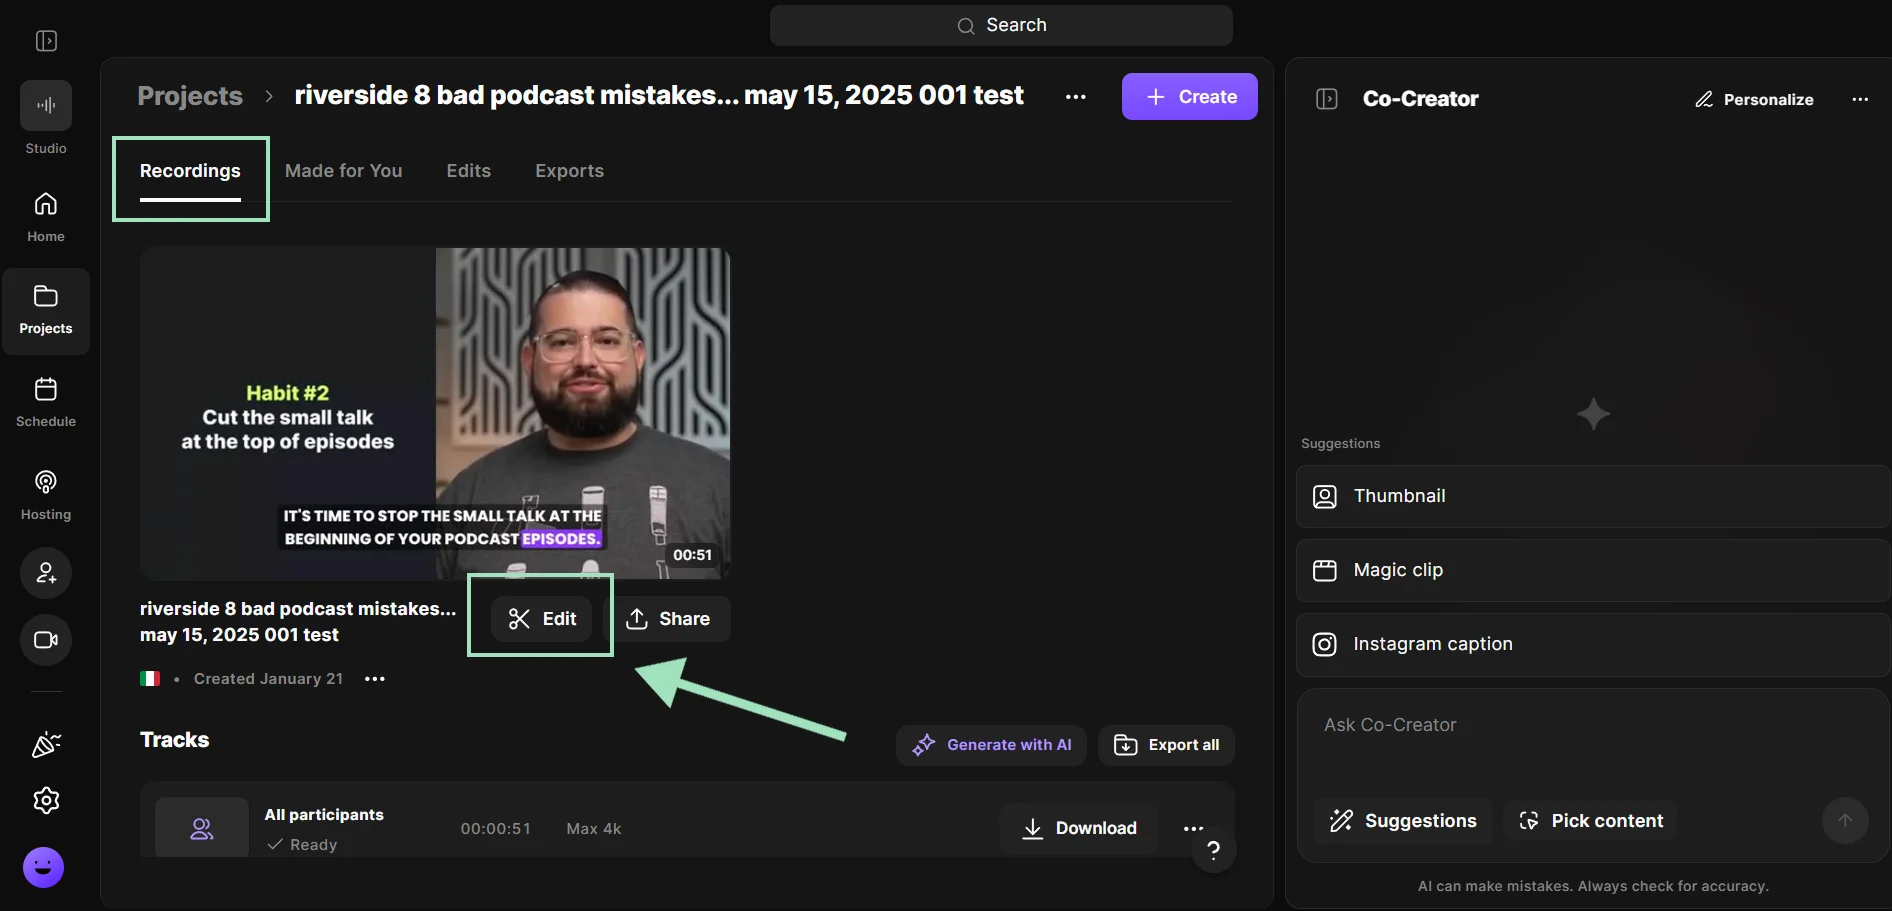
Step 1: Wait for your recording files to upload. Open the recording in the “Projects” tab, select “Recordings,” then click “Edit” to open the editor.
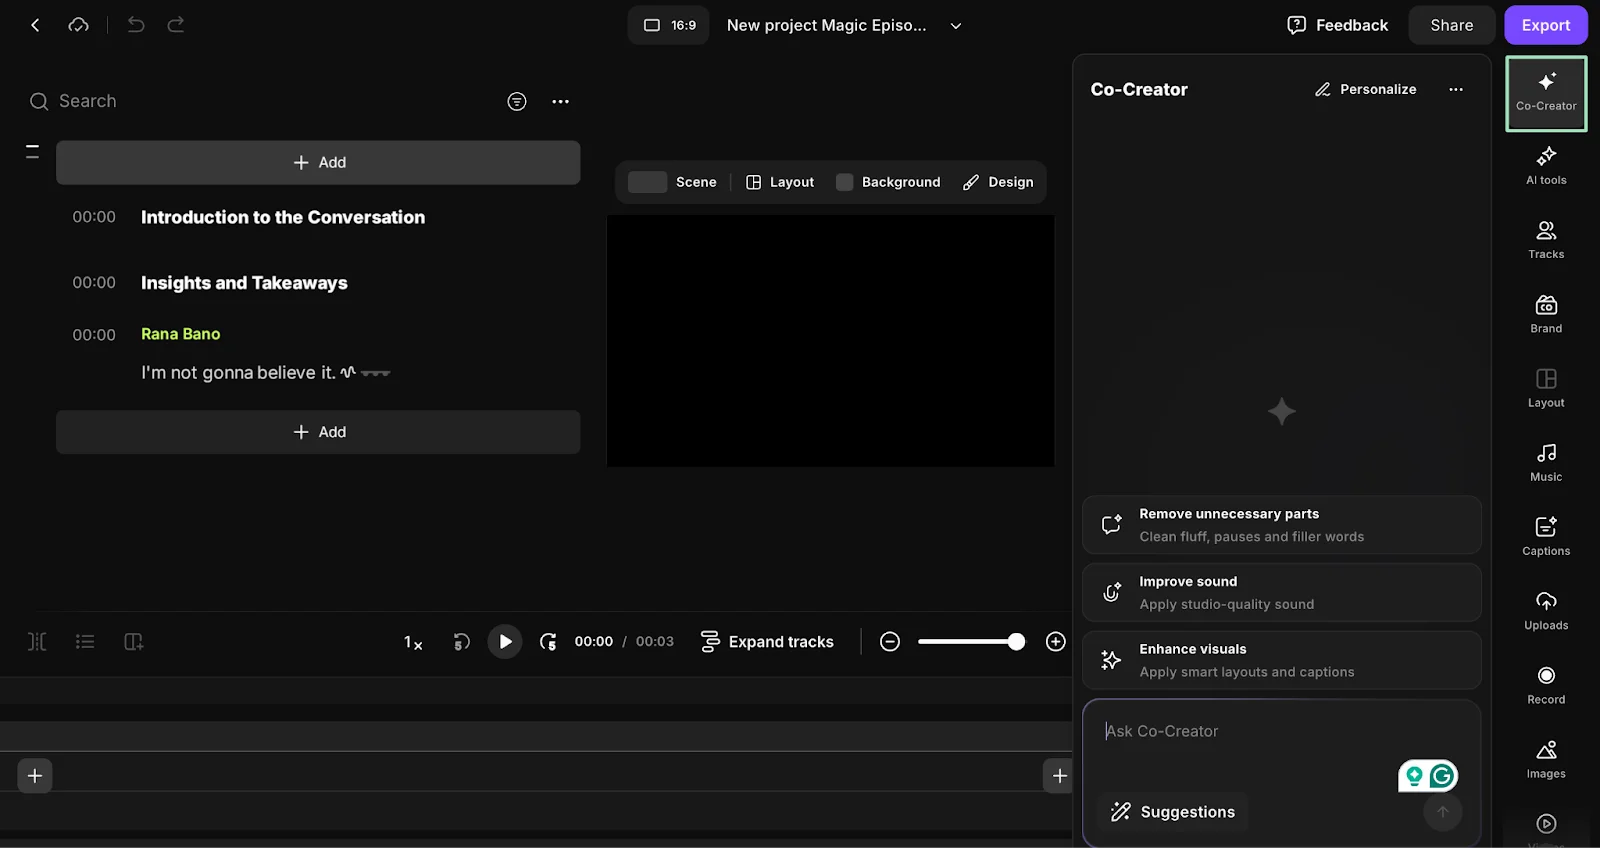
Step 2: Use Riverside’s AI tools to reduce background noise, remove filler words, upgrade the audio quality, and normalize audio levels. You can also use Co-Creator, our chat-based AI agent o help with edits just by prompting it.
Step 3: Next, refine your episode with the text-based editor. Simply delete words or phrases in the recording transcript to remove them from the video.

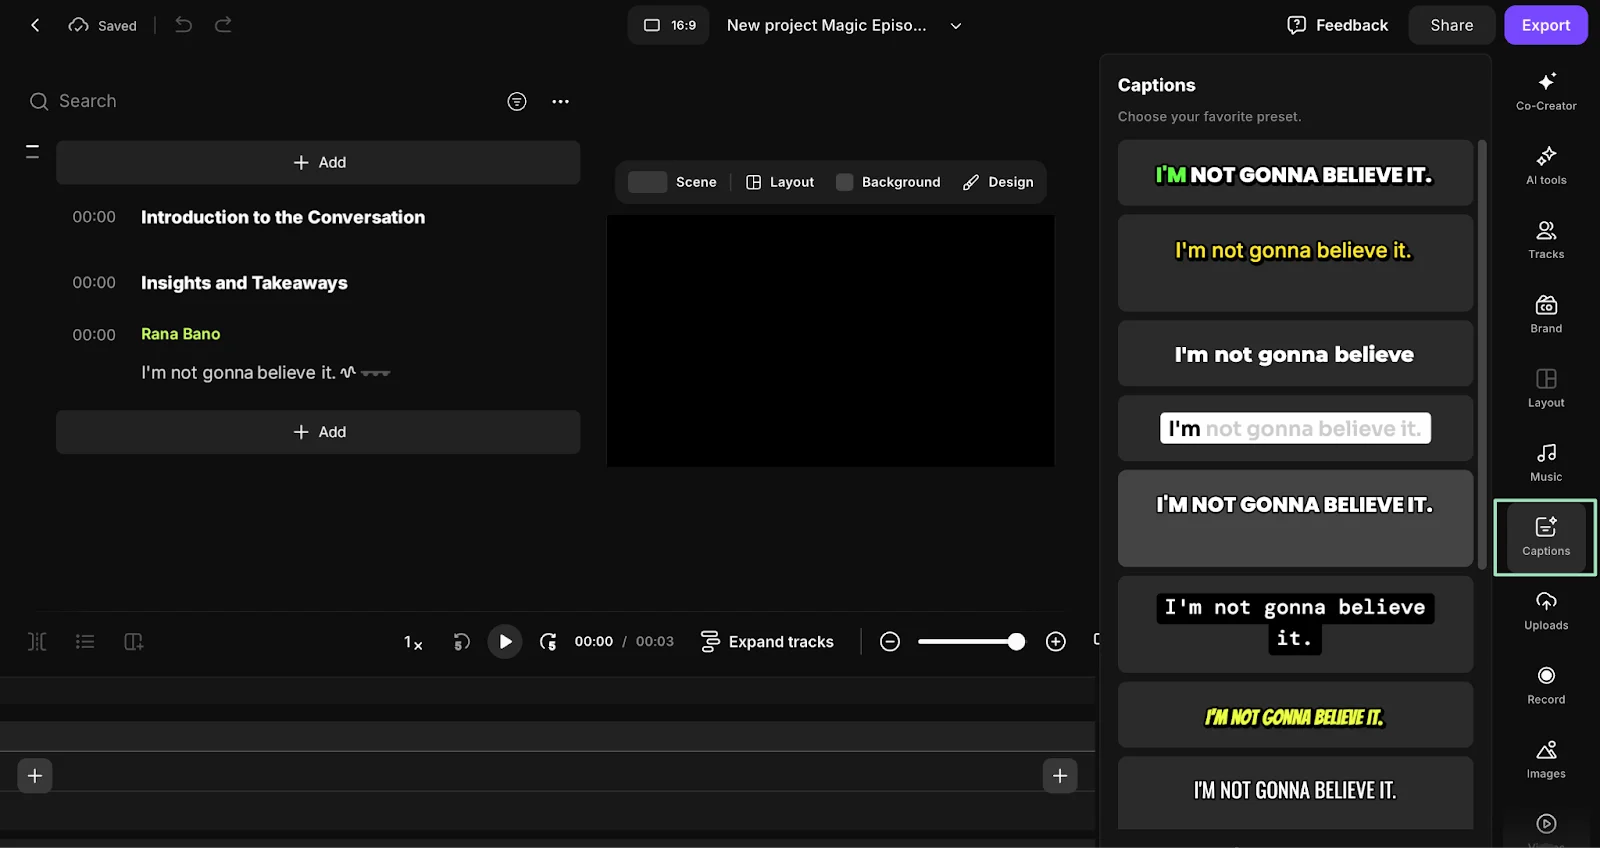
Step 4: Click on the “Captions” tab to select a style for your captions, then use the pop-up styling bar to adjust placement and appearance. This keeps your content accessible, as many YouTube viewers watch on mobile and with the sound off.
Step 5: Make your content more engaging with B-roll, overlays, or music from Riverside’s built-in stock library. You can access everything in the left-hand toolbar.

Step 6: Export your completed video in a 16:9 layout and MP4 format for YouTube.
Step 4: Create a YouTube podcast playlist
On YouTube, podcasts live inside playlists. This lets viewers watch or listen to episodes in order and helps YouTube understand that the content belongs together.
To create your podcast playlist, follow these steps:
Step 1: Inside YouTube, click on your profile icon and select “YouTube Studio.”

Step 2: Click “Create” on the top-right of your screen and select “New Podcast.” For now, choose “Create new podcast.” (I’ll show you how to create a YouTube podcast from an existing show later).

Step 3: Enter your podcast details, including the title, description, visibility, and thumbnail.

Step 4: At the end of the form, click “Add videos.”

If you want to include episodes that are already on your channel, select them from your existing videos.
If you want to upload new episodes, finish creating the podcast first, then open your new podcast playlist. Click “Add videos,” and select “Upload new videos.” Fill in the video details as you normally would for a YouTube upload.
Once you save, your episodes will appear together in a dedicated podcast playlist.
Step 5: Promote your YouTube podcast
Promotion is how most YouTube podcasts actually grow. Full episodes matter, but short clips are what bring in new viewers.
Riverside’s Magic Clips gives you a big advantage here by automatically identifying and generating short, shareable moments from your recordings. You can review the suggested clips, make quick changes if needed, and export them as Shorts-ready videos.
After publishing your clips, treat them as entry points. Each one should do a single job: earn attention and point viewers somewhere specific (i.e., the full episode or your podcast playlist, not a homepage or a generic channel link).
To close the loop:
- Add a link to the full episode or playlist in the clip’s description or pinned comment.
- Use consistent wording so viewers know what they’ll get when they click.
- Schedule clips out over time instead of posting everything on launch day.
Re-sharing matters because Shorts have a limited lifespan. Posting the same clip again weeks later (or pulling a different moment from the same episode) gives your content another chance to reach new viewers.
Outside of YouTube, promotion works best when you provide context. Instead of dropping a link, explain why the episode is worth watching. For example:
- In a newsletter, highlight one insight from the episode and link to the full video.
- In a community, frame the episode around a question that it answers.
- On social, pair the clip with a short explanation of who it’s for.
This ties promotion back to growth by matching content to intent. This way, you promote your podcast consistently and make sure each episode has more than one chance to get discovered.
Step 6: Assess success with YouTube podcast analytics
To grow your YouTube podcast, you need to know whether people are finding it, how long they tune in for, and if they come back.
YouTube Studio gives you the data to answer those questions. By filtering analytics at the playlist level, you can see how your podcast performs as a series (not just on an individual video basis).
To do this, open YouTube Studio, go to “Analytics,” and select “Content.” From there, choose your podcast playlist to view metrics for all episodes in that series.
Key metrics to monitor
- Watch time indicates the total minutes viewers have spent watching your videos. High watch time indicates strong viewer engagement.
- Views show the number of times your videos have been watched. This helps gauge your podcast's reach.
- Average view duration is the average amount of time viewers spend watching your videos. Longer durations suggest higher interest.
- Audience retention shows how well your videos keep viewers' attention over time. A higher retention rate suggests your content is valuable and relevant for your audience.
- Subscriber growth reveals the number of new subscribers gained from your podcast episodes. This indicates growing interest and a loyal audience.
- Engagement includes likes, comments, and shares on your videos. High engagement levels are a good sign of active viewer interaction.
While this is not a metric, you should also routinely reference the “What your audience watches” report. This tells you what kind of content resonates with your audience so you can take inspiration for future episodes.
How to start a YouTube podcast from an existing show
YouTube now supports podcasts in a few different ways, depending on how your show is currently set up.
If you already have a podcast, getting it onto YouTube is much easier than launching from scratch.
How to start a podcast on YouTube using an RSS feed URL
If your podcast already has an RSS feed, this is usually the fastest option to add your podcast to YouTube.
Here’s how:
Step 1: Inside YouTube Studio, click “Create” and select “New Podcast” to create a new podcast playlist. Then, click “Submit an RSS feed.”

Step 2: Submit your RSS feed. First, accept the terms and conditions, then click “Next,” to submit your RSS feed URL.

Step 3: Verify and set up your podcast. You’ll get a verification code in your email to do this.
Step 4: From here, go to “Upload” settings, where you can choose to:
- Upload all the full episodes in your RSS feed.
- Upload episodes beginning from a certain date.
- Only upload upcoming or new episodes.
Make sure to also fill in whether you include paid promotions in your show.
Note: All old episodes are initially published privately and your channel subscribers won't receive any notifications for them. Only once you publish your podcast, they will be notified about the new episodes uploaded from your RSS feed.
Step 5: Designate your podcast’s visibility. You can select:
- Public: Anyone can see it.
- Unlisted: Only people with a link can see it.
- Private: Only people you invite can see it.
Step 6: Click “Save” to complete setup.
Your episodes will upload over the next few days. Once uploads finish, you’ll see a “Publish” button in YouTube Studio (“Content” → “Podcasts”). Your podcast won’t go public until you publish.
If you want a more visual walkthrough, check out our video on publishing a podcast to YouTube.
How to turn an existing YouTube playlist into a podcast playlist
If you already have a YouTube playlist and want to turn it into a podcast playlist, here’s how:.
Step 1: Click “Create” → “New podcast,” then select “Set an existing playlist as a podcast.”
Step 2: Select the playlist you’d like to turn into a podcast playlist.

Step 3: Click “Next” and then fill in your podcast details. Click “Save.”
To improve your videos’ discoverability, optimize the titles, descriptions, and tags with relevant keywords. You should also use uniform episode titles (e.g., "Episode 1: Topic") to maintain consistency.
Step 4: To change episode order later, go to “Content” → “Podcasts” and click Edit on the podcast you’d like to update.
On the right-hand side, choose an option from the “Default Video Order” menu and save.

How to upload an audio podcast on YouTube
You can publish an audio podcast on YouTube even if you don’t have video. If you connect your podcast to YouTube using an RSS feed, YouTube will display each episode as a video with a static image pulled from your podcast artwork.
This works well for distribution, but gives you limited control over how the episode looks.
If you want something more engaging, an audio-only video (often called an audiogram) is a better option. This lets you pair your audio with a custom background, captions, and simple visuals, then upload it as a standard YouTube video.
To do this, start by uploading or recording your audio podcast in Riverside. Once your audio is ready, follow these steps to create an audio-only video:
Step 1: Log in to Riverside, select your studio, and open the relevant recording from the “Projects” page.
Step 2: Hover over the recording and click “Edit” to open the editor.
Step 3: Customize the video using the editing tools. From the toolbar, you can:
- Choose your background or layout.
- Add images and text.
- Add dynamic captions and style them as you like.
- Trim your recording, and more!
Step 4: Export the final video as an MP4 file and upload it to YouTube.
You can find a more detailed guide on how to create a catchy audiogram for your podcast here:
Best practices for starting a podcast on YouTube
For long-term success, creators should think beyond individual episodes, according to Michele Cobb, Executive Director of The Podcast Academy (TPA).
“A successful podcast is about everything — from the audio quality to the metadata, how you write, and how you make it visible,” he explains. “You need to think about all those elements holistically when you’re trying to grow your show.”
That mindset matters even more on YouTube, where discovery, viewing behavior, and format consistency all affect how your podcast performs. The following do’s and don’ts will help you launch (and grow!) your podcast more effectively on the platform.
Do
- Design episodes for partial viewing: Most viewers won’t start at minute one. They arrive via search or recommendations. Structure episodes so someone can jump in, understand the topic quickly, and keep watching without needing context from earlier episodes.
- Optimize for search results: Include relevant keywords in your episode title, description, and tags to help listeners easily find your show in YouTube search results. You can learn more about this in our guide on podcast SEO.
- Create repeatable episode formats: YouTube learns your show faster when your episodes follow a familiar pattern. Keep pacing, structure, and length consistent so viewers know what to expect and are more likely to subscribe.
- Use clips for discovery, not recap: Strong clips answer a single question or make one clear point. Avoid ‘fun moments’ that rely on context. If a clip doesn’t make sense on its own, it won’t bring new viewers to the show.
Don’t
- Don’t prioritize clicks over retention: Strong titles and thumbnails get attention, but weak openings lose it. If viewers leave early, YouTube stops promoting the video.
- Don’t publish once and wait: Episodes often gain traction later, usually after a Short or a search result brings in new viewers. When that happens, treat the episode like it’s new again. Update the description to reflect what’s resonating, or re-share the full episode when a Short starts driving traffic.
Both actions increase views and watch time, which makes YouTube more likely to keep recommending the episode. - Don’t change formats too often: Frequent format changes make it harder for YouTube to understand your channel. Small refinements are fine, but major shifts should be intentional and relatively infrequent.
FAQs on how to start a podcast on YouTube
What is a YouTube podcast?
A YouTube podcast is a video or audio series uploaded to YouTube. The format is similar to that of traditional podcasts. And as with any other YouTube video, people can find your show by browsing the platform and its search function or through recommendations.
How much does it cost to start a podcast on YouTube?
The average cost of starting any podcast is between $100 and $5,000. You can potentially start for free using a smartphone and free editing software, such as the free version of Riverside. If you want to invest more, a basic setup might include a USB microphone and headphones.
What do you need to start a podcast on YouTube?
Before you start your YouTube podcast, here’s a quick list of the necessities:
- Content: A captivating topic and format that appeals to your target audience. Read our guide on how to come up with great video podcast topics.
- Recording equipment: At minimum, you'll need a smartphone or microphone to capture audio.
- Editing software: Editing software will help you improve audio quality and flow (especially for video podcasts). With Riverside, you can record and edit your YouTube podcast in one place.
- YouTube channel: This is your home base for your podcast. You'll need to create a YouTube account and set up your channel to upload your episodes.
What software should I use for editing my YouTube podcast?
If you want the simplest podcasting workflow, use Riverside’s editor (especially if you’re already recording there). It’s designed for podcast-style workflows and keeps recording, editing, and exporting in one place.
If you’re choosing based on how you like to edit, here’s a quick breakdown:
- For fast, podcast-first editing: Use the Riverside video editor. It’s well-suited for trimming, tightening episodes, and publishing consistently without a steep learning curve.
- For creating multiple Shorts from each episode: Use Riverside’s Magic Clips to quickly pull short, shareable moments from long recordings.
- For help with titles, descriptions, thumbnails, and promo assets: Use Riverside’s Co-Creator to generate supporting content alongside your edits.
- For high-end, cinematic editing: Adobe Premiere Pro and DaVinci Resolve are great for heavy visuals and detailed post-production.
Do podcasts on YouTube make money?
YouTube is currently paying an average of $3 to $5 for every 1,000 views. You can also generate revenue through sponsorships and affiliate marketing, especially if you attract a large audience.
After you create your YouTube podcast series, it’s a smart move to get a YouTube Adsense account so you can start monetizing your content on the platform.
Is it worth putting your podcast on YouTube?
Yes, it is. It even has a dedicated podcast page! YouTube's vast audience and powerful search engine make it a valuable platform for growing your podcast's reach and engagement.
Is it better to start a podcast or a YouTube channel?
The choice is yours. Podcasts are great for in-depth discussions, while YouTube channels can include a variety of video content. Combining both can maximize your reach.
What are some successful examples of YouTube podcasts?
There’s no single ‘right’ format for a YouTube podcast, but these shows are worth studying because they understand how YouTube audiences watch:
- The Diary of a CEO: Long-form interviews with clear topics and consistent presentation.
- H3 Podcast: Frequent episodes with a live-first feel and an engaged community.
- Lex Fridman Podcast: Deep, long episodes that are evergreen because the audience knows exactly what they’re getting.
- Colin and Samir: Creator-economy interviews designed specifically for YouTube, with strong pacing and clear audience focus.
How often should I upload new episodes to my YouTube podcast?
If you’re starting out, weekly is a great goal. If that feels like too much, every 2 weeks is still a strong cadence, as long as you stay consistent and keep quality high. YouTube itself recommends choosing a frequency you can maintain long-term.
Here’s an example of a practical schedule that works well for many podcasts:
- Full episodes: Weekly or biweekly.
- Shorts or clips: 2–5 per episode to help new viewers discover your show.


.webp)
.webp)


